Anybody that has done any do-it-yourself type of renovation or construction project will relate to my next statement. Everything is more work than you think it will be. Of course, there were aspects that went incredibly smooth, but even those took more time than expected.
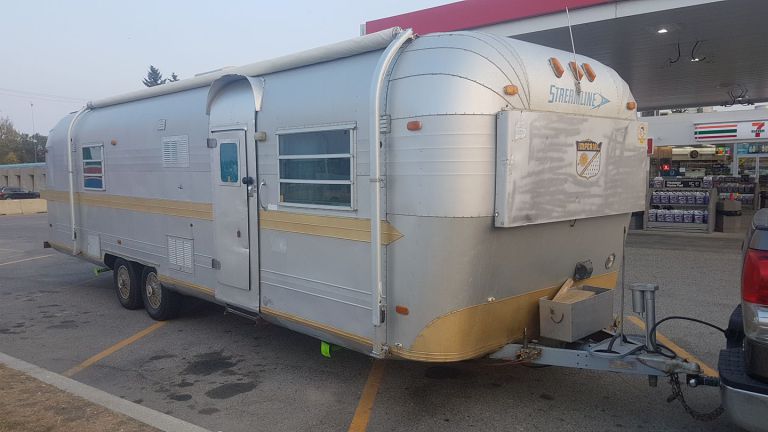
Pre-gut Video Tour of Trailer
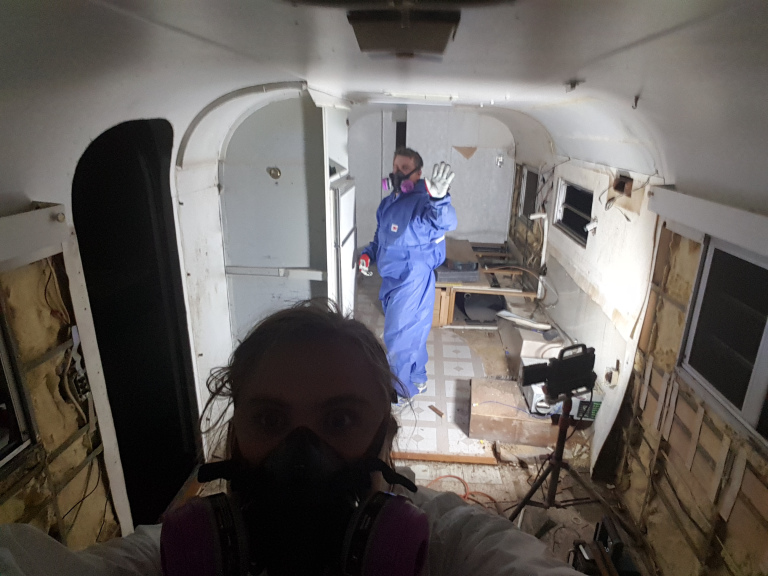
As far as the condition of the trailer goes; remember when I said at first glance it wasn’t that bad? Well, subsequent glances really started to contradict that statement. A few pieces of the aluminum sheet that lined the walls were loose. They were bent up and dented so the intention was to replace them, and now that we owned the trailer we could remove said panels and look in behind the walls. What hid there was nasty. Mice had made a home. And I learned that mice will shit where they sleep. With one panel off we could see the mice and their shit carried on behind the next one, so down it came too. And the next one, and the next one, and the next one. It became apparent very quickly that we would be gutting the trailer shell completely. Haz-mat suits and masks were donned and the demo began. The cabinetry was removed as well as appliances, water tank, water heater, furnace, shower and so on. You get the idea – everything. Everything was cleaned and treated with a kill all type spray to which I can’t recall the name of. Typically, demolition work in a home can often be done with a few basic tools (Sawzall, hammer, big pry bar) and brute force. Aluminium trailers are nothing like that. Everything, and I mean everything, is secured, joined and fastened using rivets. Lots of rivets. Did I mention that shit loads of rivets were used? I could happily go through the rest of my life without touching another rivet.
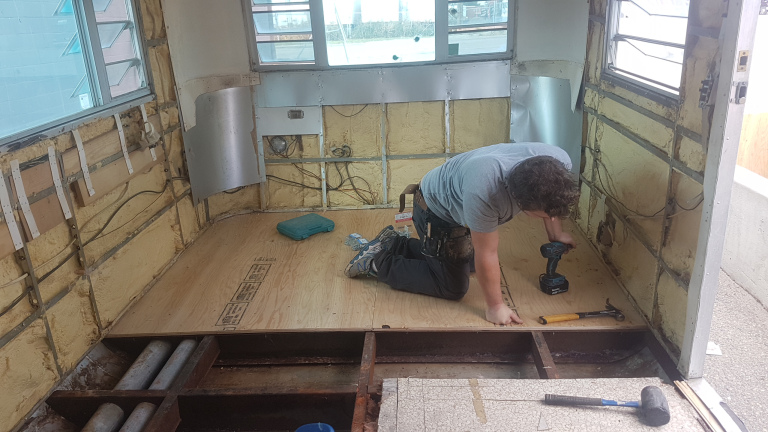
With the walls all stripped and the trailer empty the next logical step was to repair the floor. Fortunately, there were no rivets used on the floor. But that is not to say that the floor wasn’t a royal pain. It may have been one of the most difficult components to repair. And now, with all the cabinetry removed we could see the condition of the entire floor. Sitting for years, not covered, with broken roof vent covers allowing in all the elements it is not how I would suggest one store a camper they intend on using again one day. All around the perimeter, there were soft spots and signs of rot. The original 5/8” plywood all had to go. We began that pain-staking process. 5 feet at a time a process of steps was followed and repeated. The original construction of the trailer before any indoor buildout went as follows; build frame out of steel, lay thin fiberglass insulation across the top of the frame, cover the frame with plywood and screw down, drop upper shell onto plywood and secure upper shell through plywood and into the steel frame below. So here lied the problem. We did not have the means to lift the upper shell off the floor. Many professional restorers will do just that. And it makes sense because it really would be easier, if you could. But we couldn’t. 5 feet at a time we removed the plywood, chiseled and broke it out from where it sat under the walls, supported the walls while we cleaned up everything below, including a squirrel’s winter stash. I hope he’s doing ok. The squirrel that is. He had at least 2 lbs of sunflower seeds stashed below in the floor and I think he may have been sleeping there. He certainly didn’t shit there. I like squirrels. Mice, not so much. After a week or so we had the floor replaced with new 5/8” plywood, new r20 insulation below, and repaired a few broken welds that tied the cross supports onto the main front to back frame rails.
With the floor mostly done and a flat surface to stand on again it was time to look at electrical and plumbing. Just like a regular home, these items need to be completed before any walls are closed in or new cabinetry is installed. Fortunately for me, I’ve met some great people through the years that were both excited and willing to help with the aspects I’m not well-versed in. Electrical and plumbing would be what I’m referring to.
Fraser, who own NextGen Automotive and is a shop neighbor came through and did all the wiring except for the 120V wiring. Starting with the exterior, all marker lights (18 I believe), which were a mix of numerous assorted styles as they’d been slowly replaced over the years, were replaced with new LED lights. The original taillights were disassembled, cleaned up, repaired and re-installed. All wiring associated with those lights, the trailer brakes, a new break-away kit, and the harness was replaced and re-wired with a new harness to connect to the pickup. Cory, from Rooter Man, also a shop neighbor, came over and replaced the old propane lines and installed new regulators for the tanks as well as shutoffs prior to each appliance (water heater and furnace). And I did the 120V wiring. In a later write-up, I’ll detail all the electrical components and a review of their performance after we’ve had some time to use everything.
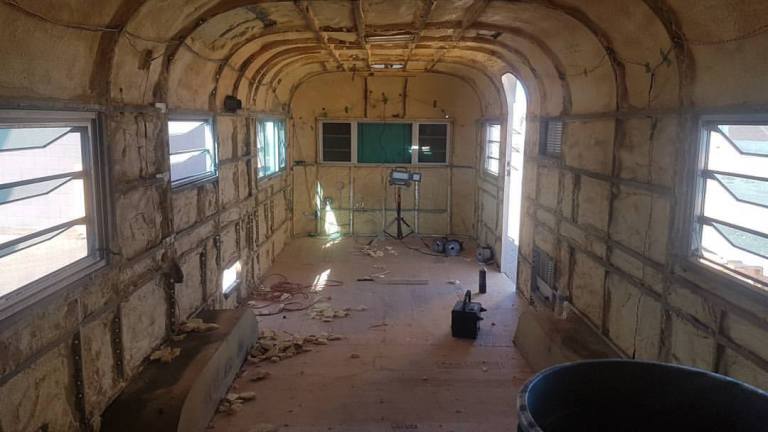
With the “behind the walls” work is done we were ready to start finishing the inside. But first, insulation. The trailer appears to have been spray foam insulated from the factory. Impressive for 1973. I feel though that it was less about insulation and more about providing rigidity to the aluminum walls. It worked. It held up quite well over the years but was thin in many places. We called in a spray foam company to top up the spray foam and try to fill the 2” thick walls as best as possible. And of course, that didn’t go smoothly either. We were experiencing slightly cooler than ideal temperatures so the foam didn’t set quick enough. It pushed all our wiring outwards instead of setting around it. It ran and pooled and cured in grapefruit size lumps, most of which would have to get cut off. I need a beer break.
Soon the fun stuff begins…
Share this:


