I love Scrivener with a deep love. Karen Traviss recommended it when I got my first three book deal back in 2013, and I thought I’d give it a try – after all there was a thirty day free trial and – hell – it’s cheap enough to take a chance on.
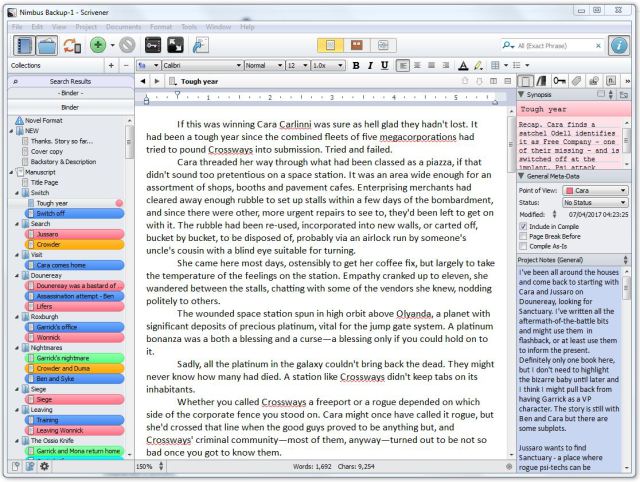 On opening it up you’ll find three columns. The wide middle column is your actual word processor. The left hand (narrower) column is the binder where you can see each chapter and scene, plus research notes, character notes (or anything else you need for quick reference). The right hand column is the ‘inspector’ column which you can either have visible or hidden. Here you can have your scene by scene synopsis on the virtual 5 x 3 index card and/or you can enter General Meta-data and (below it) notes.
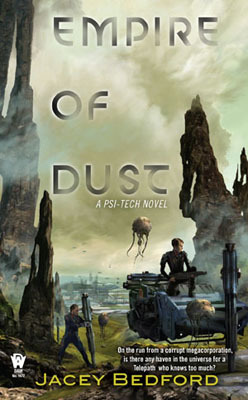 I pasted my novel into the word processor to give it a try, and proceeded to split it down into scenes. This was Empire of Dust (DAW, 2014). I’ve written every subsequent novel in Scrivener and wouldn’t be without it, now. I’d say you need to allow a couple of days to explore it and get to know its features before it starts to feel like an old friend.
Examining the full manuscript of Empire on a scene by scene basis – and being able to see all the scenes laid out in the binder (left hand column) was a revelation. Empire is a multiple viewpoint novel – each VP in tight third person. So in Scrivener I allocated colours to VP characters (in the general Meta-Data box) and could instantly see where I’d clumped too much from one individual too close together, or had too long a gap between a particular VP character’s scenes.
Editing to move scenes around in the narrative is easy – just drag and drop in the binder. And you don’t break things if you get it wrong because it’s easy to reverse any decision. There’s also a cork board which enables you to view your scenes as individual record cards (and move them at will). It’s great for plotting as well as editing.
You can split your screen if you want to edit two scenes side by side.

The other brilliant feature of Scrivener is that by selecting specific scenes you can view all of one person’s VP scenes as a continuous narrative, so you can see whether the story is logical from one character’s point of view. I have one secondary character whose VP is important, but limited, and I realised that I’d not given him a very good character arc because some of the things that drove his segment of the plot were happening off the page. Adding in very short scenes that were pivotal for him gave him a complete arc and added less than 1000 words to the total word count.
Similarly I had chosen to limit the viewpoint scenes from my three antagonists. (Sigh… yes a story with three villains… I know… but I think it works and only one of them is pure eeeevil.) When I viewed each of their arcs as a continuous narrative, I could see there were gaps that shouldn’t be there. I was trying to be mysterious, but I’d actually reduced the tension because my readers didn’t know there was a great plot bunny emerging from its bunny-hole unbeknownst to my main protagonists.
So I was able to swap scenes around, try them out, and return them to their original place or try them somewhere else. I’d never have been able to keep track of all that if I’d been cutting and pasting via a straightforward word processor.
Is Scrivener easy? Yes and no. The word processor section – the middle column – is pretty much like any other word processor you are likely to have used, but you need to make time to understand Scrivener’s other two columns. The binder column (left hand side) is my favourite resource. I write in scenes at the first draft stage (breaking it up into chapters later) so each named scene is listed in the binder, but you can also keep your character sketches and research notes there, too (including illustrations and photos). I’ve used it for my trilogies. When I start the second or third book, I simply duplicate the previous book into a new Scrivener file in a new folder, rename it as the new book, and remove the text from the previous book. It leaves me with the characters, locations and essential research in a binder ready for writing the next instalment.
 Scrivener’s own helpfiles are pretty good, but they cover a wealth of features (say, for academic writing) that, as a fiction author, you probably won’t need. My recommendation is that to get to grips with Scrivener for authors you need to read David Hewson’s book, “Writing a Novel with Scrivener,” available from the megacorp named after a South American river for a mere £4.48. It shows you the features you’re most likely to need in detail while ignoring the features less useful for fiction writing.
You can get a Scrivener free trial which I thought was for a month but turned out to be thirty days of use – and they didn’t need to be consecutive days, either, which is very generous and gives you plenty of time to see if you really like it.
 Jacey Bedford is the secretary of Milford and editor of this blog, to which she sometimes contributes. Her own blog is at https://jaceybedford.wordpress.com/. She writes science fiction and fantasy novels (mostly) with a few short stories. She’s British, but is published by DAW in the USA. Her science fiction trilogy – the Psi-Tech trilogy – is now complete (Empire of Dust, Crossways and Nimbus) and two books are available in the Rowankind historical fantasy trilogy (Winterwood and Silverwolf) with the third (Rowankind) due in November 2018. Find out more at Jacey’s own website. You can also follow her on Facebook an she tweets @jaceybedford