First thing’s first: I love Milk Bar and Christina Tosi. The last time I went to New York City, I was there for three days and went to Milk Bar five times. I own the Momofuku Milk Bar cookbook, spazzed out when Christina joined MasterChef, and went to the Twist pop-up in town.
My boyfriend’s birthday was last week, and I decided to finally redeem myself from the first time I attempted to make this cake (it sucked) and try to make my favorite birthday cake for a second time. BOYYYYYYYYYY, I think I came pretty close. (Keep reading to see how I made it!)

Making the cake was a piece of cake. I was missing veggie shortening and buttermilk and was running low on butter and clear vanilla extract, so I went to the store to pick up the veggie shortening, butter, clear vanilla extract, and a pint of milk to make a buttermilk substitution and use for the cake soak.
(It’s a waste for me to buy a whole thing of buttermilk, so I end up buying milk to have enough to make a buttermilk substitution and use the leftover milk to drink/use another time because it’s easier to use up milk than buttermilk imo.)
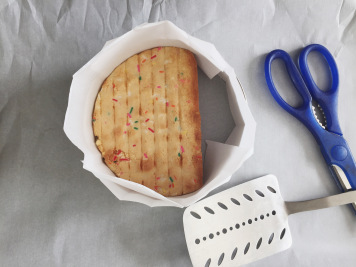
So I’m in the middle of making the cake and reach for the egg carton. Apparently, I didn’t think to check how many eggs were left before I went to the store because I was an egg short. Thank God for Old Me, who was vegan for three months and bought egg replacer. (This one to be exact if you’re curious.) Mixed up enough to yield one egg, and I was back in business. Or so I thought…turns out I misread the instructions and probably added the eggs a step too late because the mixture was already doubled in size by the time I added the wet ingredients. Also also also, the mixture never turned practically white for me, which could be because of either the lighting in my kitchen, my DIY buttermilk, or the hand mixer I used because I don’t own a stand mixer (*silently cries but not really*). Either way, I poured that baby into my Pam-ed and lined quarter sheet pan, sprinkled more sprinkles on the top, put it in the oven, and took a break.
After the cake was done cooking, I took it out and decided to invert it into a wire cooling rack to cool off. Then I decided I didn’t want to have it rest on the cooling rack, so I inverted it back into the sheet pan only to realize that the cooling rack had already (and almost literally) branded itself onto my sheet cake, so back onto the cooling rack it went.
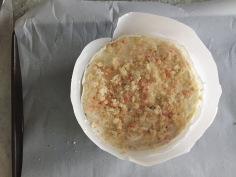
While that was cooling, I made the cake crumb and frosting.

The cake crumbs are super easy to make and just as addicting to snack on. Doesn’t it look so great?
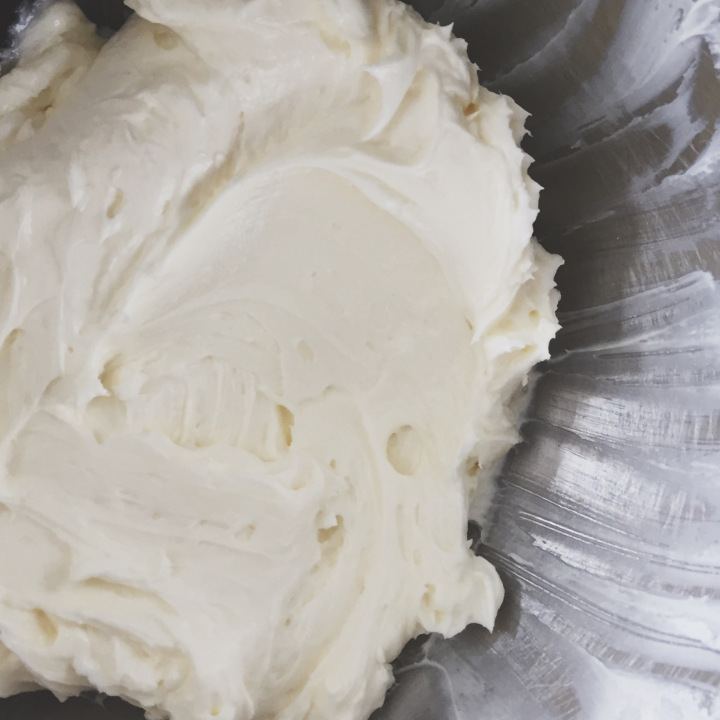
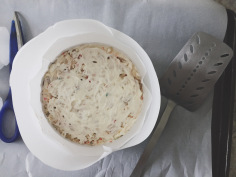
The frosting I made was like the less extreme, somewhat shy version of the frosting used in the recipe. Not only did I not have glucose, corn syrup, or citric acid on hand but I didn’t want to buy them either. Also the idea of seeing glucose and corn syrup in their true form kind of gross me out. What’s two tablespoons and a pinch? I left ’em out. The frosting wasn’t silky smooth or glossy but it still tasted good.
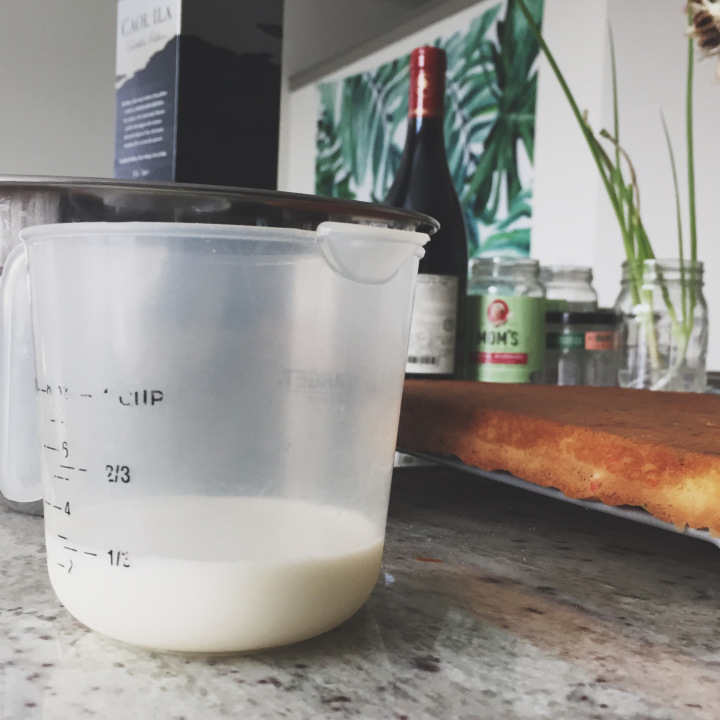
The easiest part of it all was making the cake soak. Just milk and clear vanilla extract. Not gonna lie, I bought one of those silicon brushes just for this moment. Last time, I didn’t have a brush, so I managed by using a spoon, which does the job but doesn’t feel as profesh or cool.
Now that I had everything ready, it was time to assemble the cake.

Hello, lines that my wire rack left! A little disappointing but totally whatever since you won’t see it once all the layers are stacked. The last time I made this cake, I didn’t have a cake ring and made due by tracing circles with a plate. Let me tell you: Invest in a cake ring! I bought mine on Amazon Prime Day to save some money, and every cent is worth the satisfaction of perfectly round cake layers.
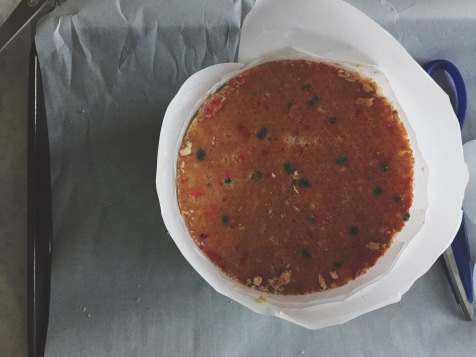
There’s a specific way Christina and Milk Bar cut the rounds from the sheet cake. You should be able to get 2 perfect circles and 2 halves of the third circle from one sheet cake.

I did a little too much math and cut myself more than I needed, which is fine since I planned to use the leftover scraps of cake to make Milk Bar’s b’day truffles (a post on that later).
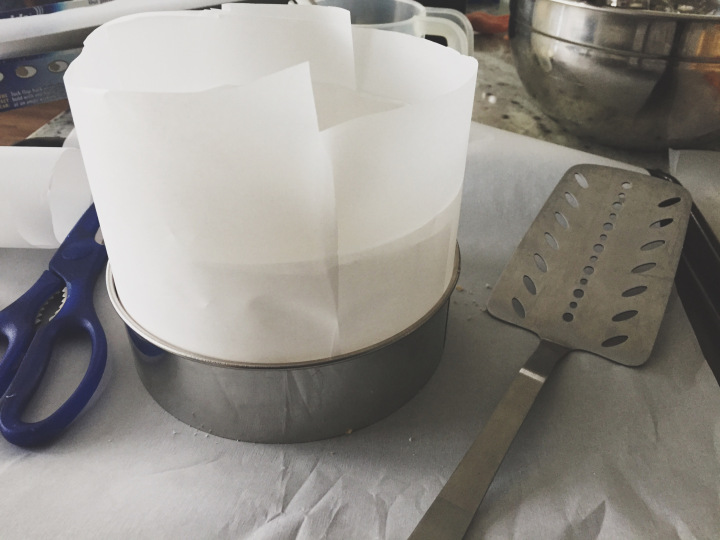
I don’t and didn’t want to buy acetate strips, so I made due with parchment paper. I’ve never worked with acetate strips, but from what I’ve seen in videos of Christina making Milk Bar cakes, they’re pretty easy and convenient to use. Not so much the case with parchment paper. It took some time to manipulate the strips of parchment paper so that it stands against the cake ring. The idea was to line the entire ring with paper in one go with some scotch tape (nope). What I ended up doing is folding the parchment a couple of times, thinking that the folded edges would help (kinda did) and then decided to instead of trying to line the whole cake ring with both strips, I’d put one strip in, place the cake along the parchment, and then slip the last strip in between the cake and cake ring. That worked. Will I buy acetate strips next time? Probably not.

Now that the cake ring was finally lined properly, all I had left to do was stack the layers. Ugly layer goes in first. Pack the hole with cake scraps. Next go around, I’ll probably cut more proportional halves so that the hole is in the center of the layer and not on the edge. Use the fancy brush to brush some cake soak. Add some frosting then some crumbles then more frosting then top with the second cake layer.
Here’s where I was to add more acetate (or in my case parchment paper) to help support the third cake layer. It was easier this time. All I had to do was slip it in between the existing strips and the cake ring.
I cut the strips a little too wide because it ended up being a little too tall lol. Nothing a little hair cut couldn’t solve. Anyway, you repeat the steps until you reach the end yadda yadda yadda.
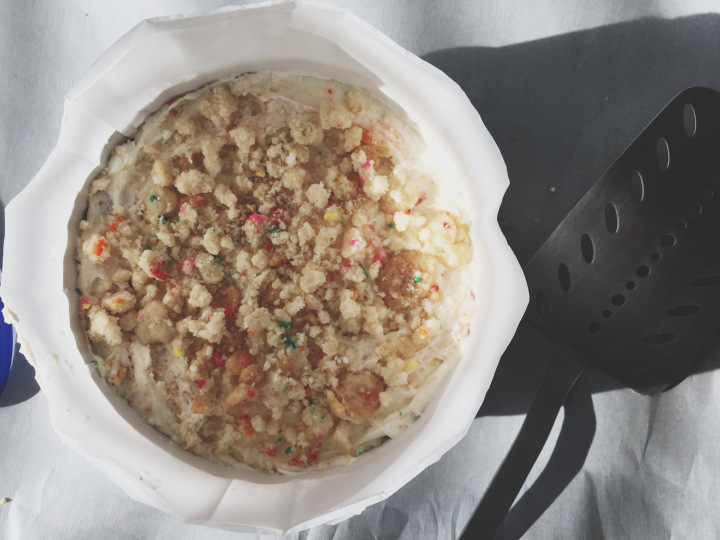
Fast forward to me putting together the last layer’s worth of frosting and crumble. I was so giddy. I did it. I was doing it. It took me all afternoon. The sun was shining and hanging out with me when I started and was peacing out when I was finishing up. Ugh it looked so good. All I had to do was pop it into the over for like 12 hours and wait.
NEXT DAY COMES. I put it in the fridge to thaw as instructed. Carefully remove the cake ring. Jump around my apartment because I did it y’all! Peel the parchment paper from the cake (v satisfying), and MARVEL at how damn good this cake looks.
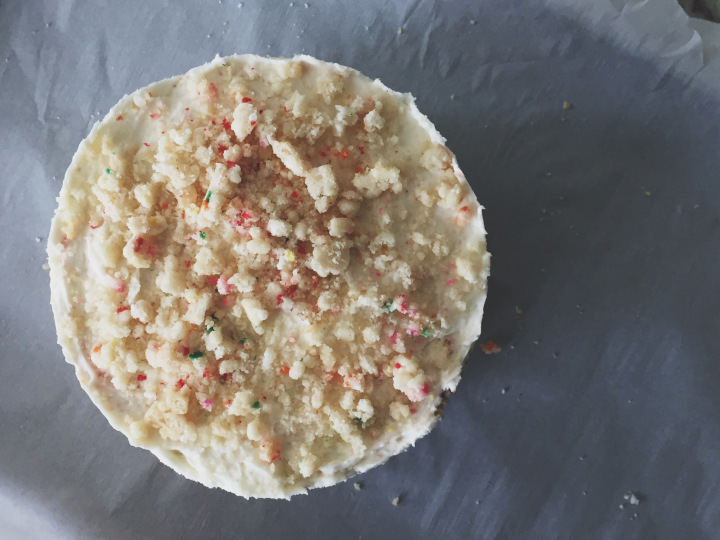
It took about 5 hours to make this cake with some breaks in between. ALL WORTH IT, OMG. This is the hardest baking project I’ve taken on. Looking at these pictures again has me feeling some kind of way.
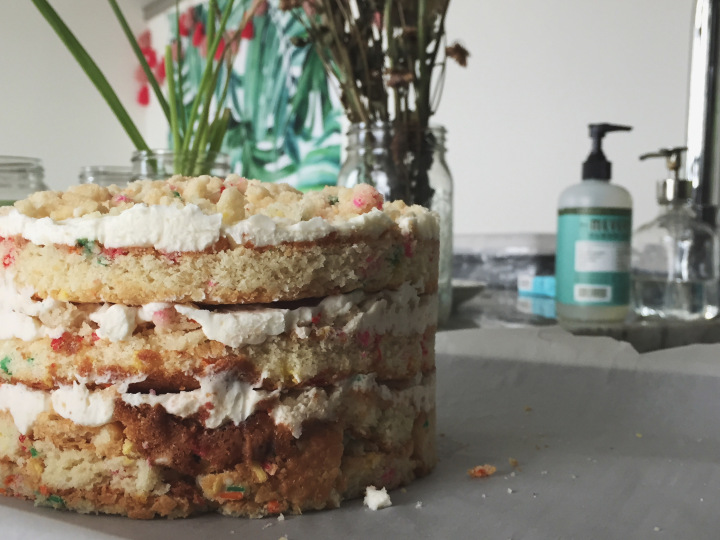
I mean look. at. this. I made this. Despite the obvious Frankenstein of a bottom tier, it looks way better than my first attempt and almost as good as the real deal. The frosting could have been a bit more impressive probably with the glucose and corn syrup (and citric acid), but I ain’t mad about it.
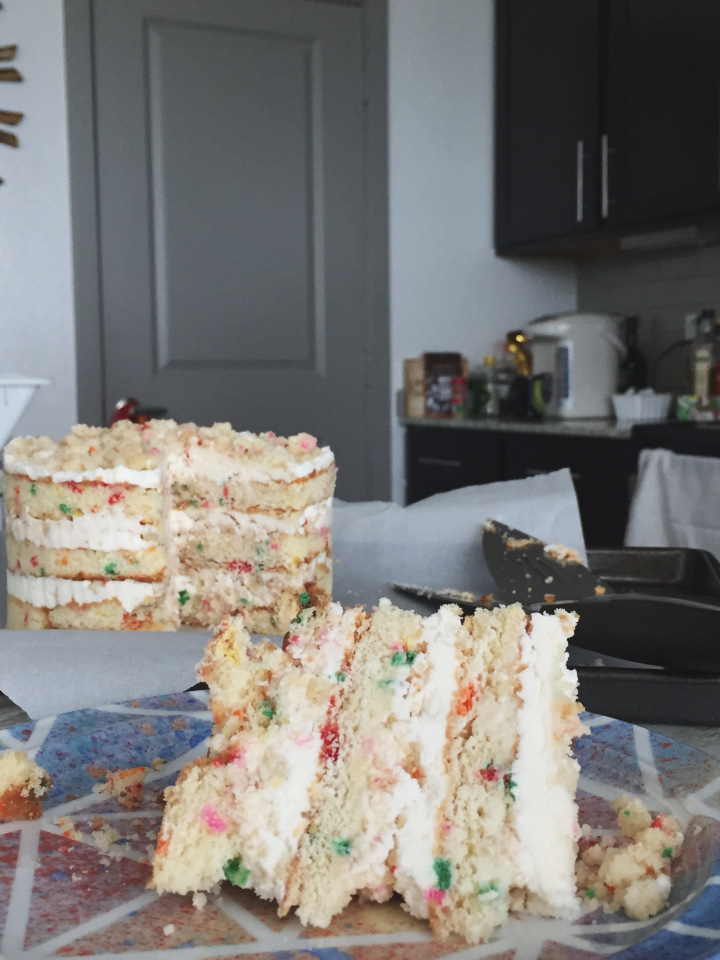
THOSE LAYERS THOUGH. 10/10 would make again. Like next month for my birthday unless I decide to be crazy and make Milk Bar’s Arnold Palmer cake, which I’ve been eying and itching to try. The Arnold Palmer cake btw is even more complicated than this one so we’ll see!
Want to have your own baking adventure and try making this? Here’s the recipe to my favorite (and best) birthday cake around.
Share this: