Welcome to the blog .. to be simple .. System Center Orchestrator is a workflow tool dedicated to automate repeated tasks .. this is done by integrating SCO with other systems by using what is called the integration packs and setting conditions that will trigger the solution you design “The Runbook” to do the repeated tasks you used to do one by one automatically reducing time and cost, I assume you have a little knowledge of Orchestrator as this blog is not dedicated to be an intro to SCO neither explaining SCO architecture ..
In this blog we will do the following (high level steps):-
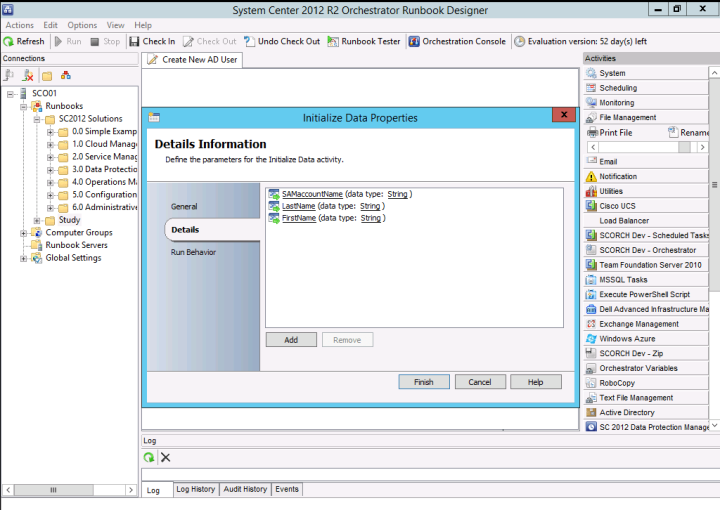
1- Set the initialize data activity to receive the AD user account first name, last name and SAM account name (login name), get this activity from the “Runbook Control” area in the activities list.
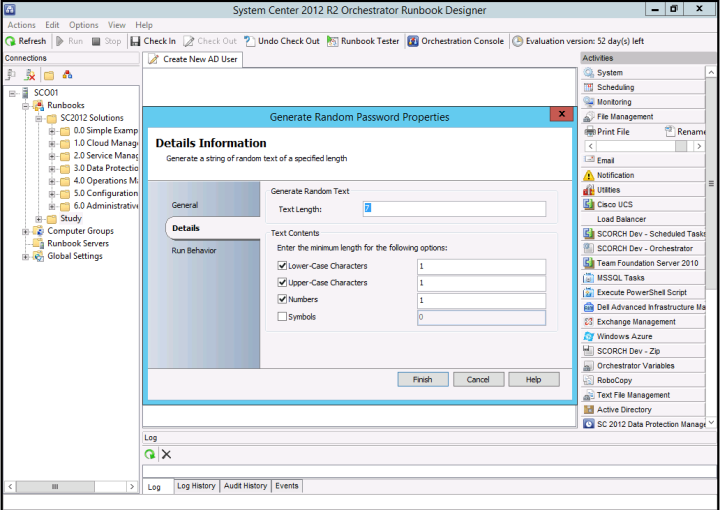
2- Use the “Generate Random Text” activity to generate a random password for the AD user account which is going to be created, drag the activity from the “Utilities” area, I renamed the activity to “Generate Random Password”, yes right click and rename it.
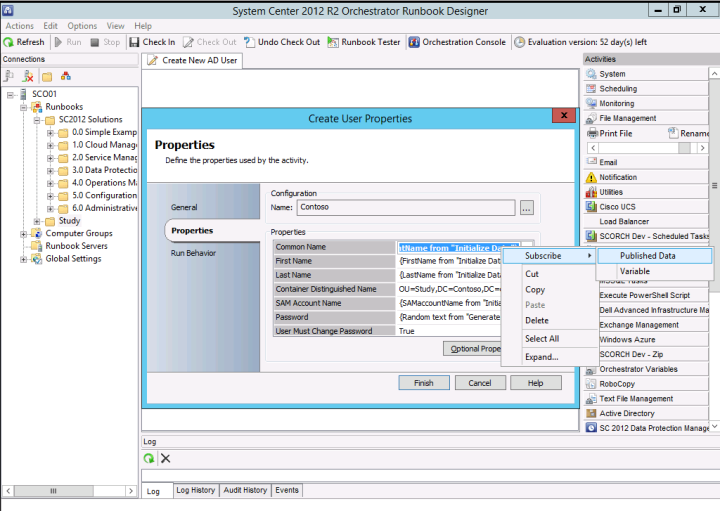
3- From the Active Directory integration pack, drag and drop two activities, Create User and Enable User.
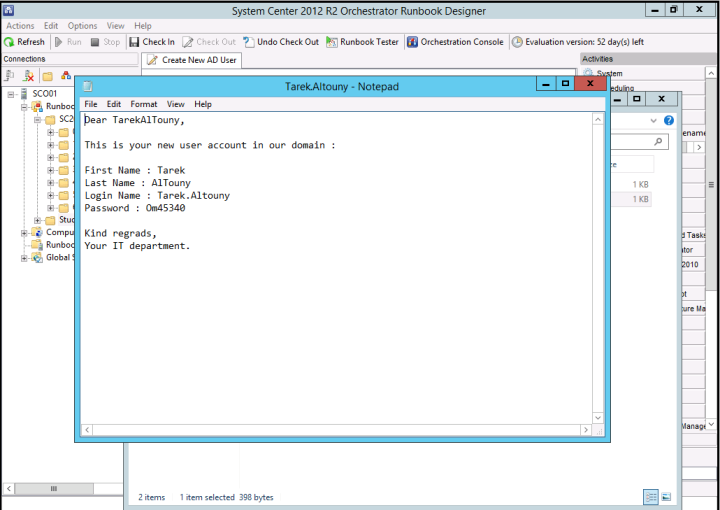
4- From the “Text File Management” area drag and drop “Append Line” activity, rename it to “Generate Password Letter”, we will use this activity to generate a text file, the text file will contain information extracted from previous activities as we will see.
5- From the “File Management” area drag and drop the “Print File” activity, this activity is going to print the file made in the step 4 .. in my lab I didn’t have a printer, So we are going to specify a fictitious printer just for the purpose of demonstration.
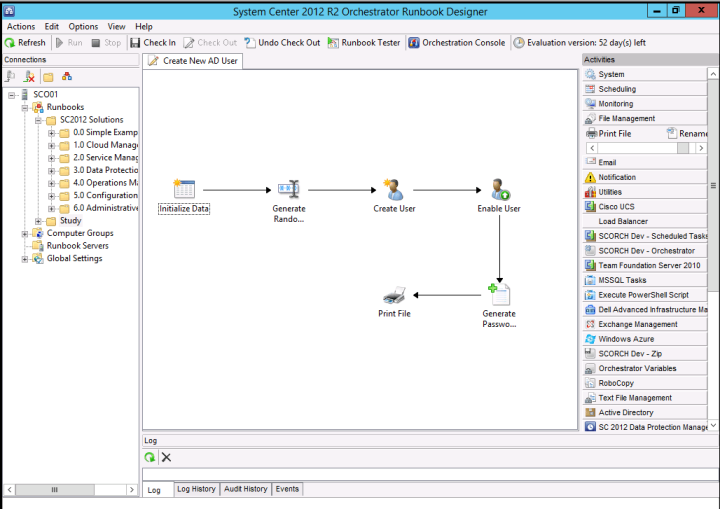
6- Finally, link all the activities together one by one, move your mouse near the tiny arrow next to any activity, a + icon will appear, hold your left click button and drag a line between any two desired activites.
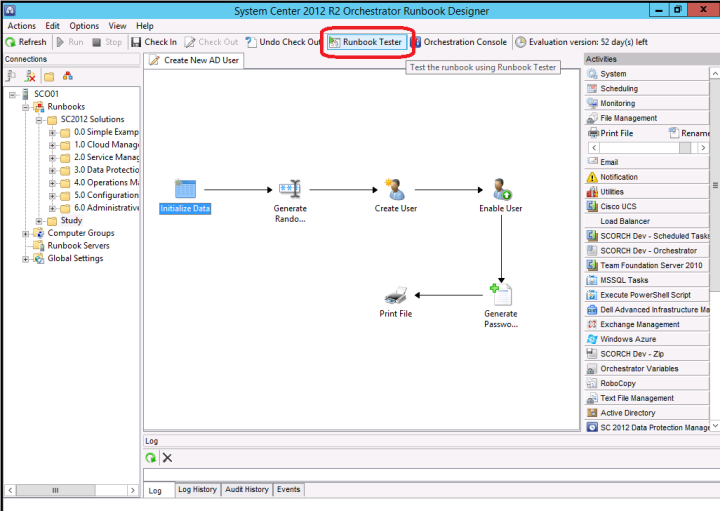
Your runbook will look like this eventually:-
NOW we have to open each activity and specify the information, parameters and conditions needed.
For the “Initialize data” activity, we will right click, choose properties and add three string parameters like the following
Next for the “Generate Random Password” activity we will specify the following information
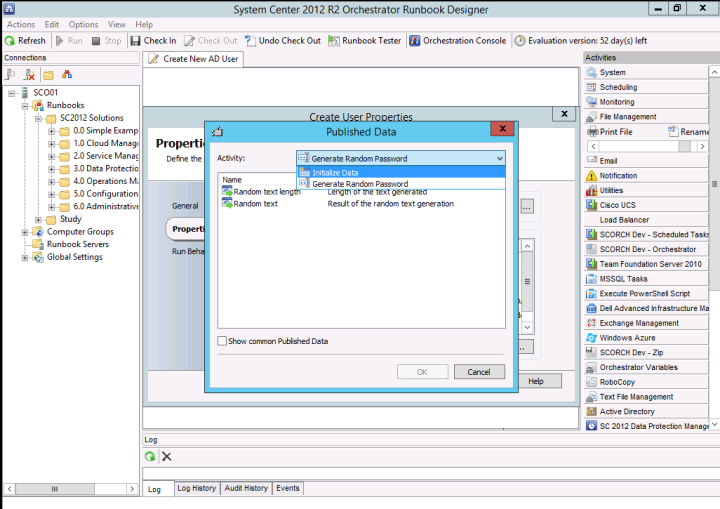
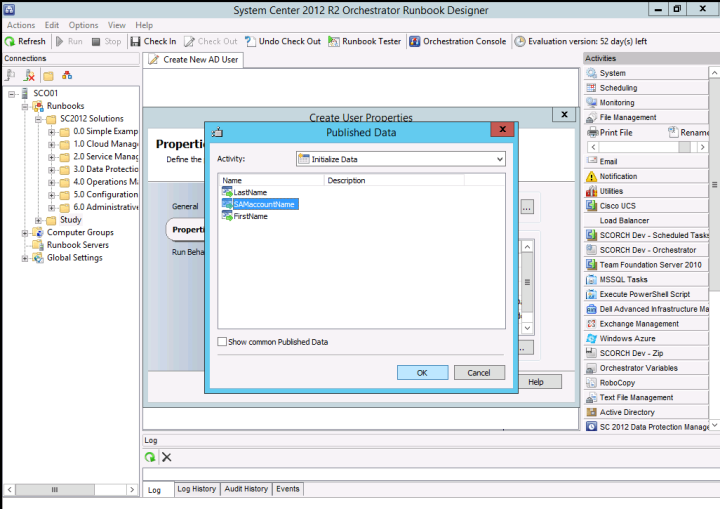
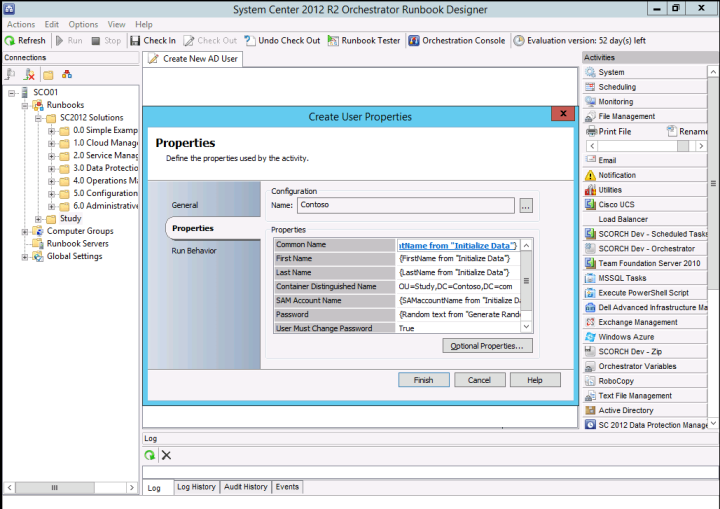
Now, to mention/use data used in previous activity, you right click in a blank area and choose subscribe/published data, choose a previous activity and select the data you want to use in the current activity, in this case, we want to create a user account whose first, last and SAM account names were mentioned in the “initialize data” activity right ? and the password will be the text generated from the “Generate Random password” activity, please check the following snapshots
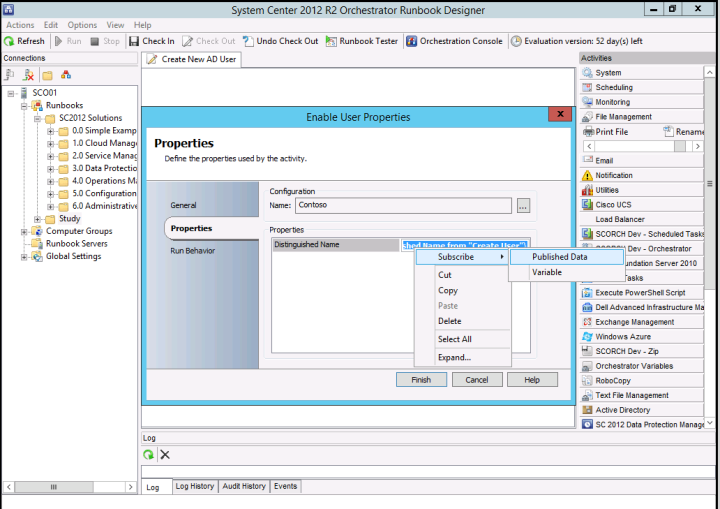
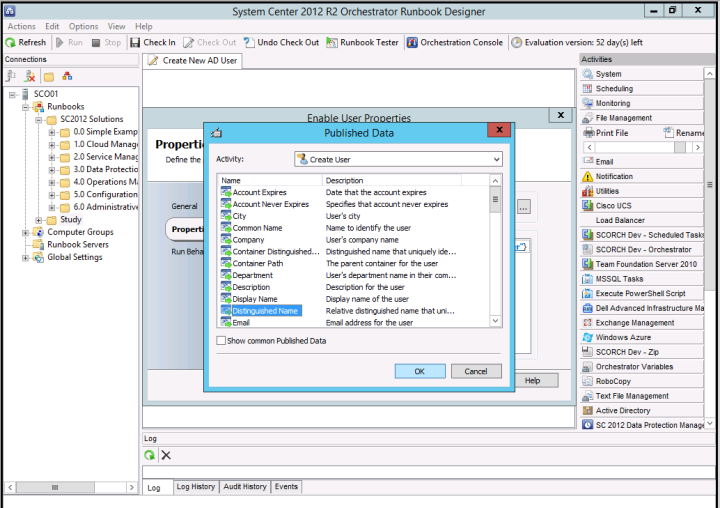
In the “Enable User” activity properties, we will tell the activity to enable the user account whose distinguished name appeared in the “create user” activity, please check the following snapshots
Now, for the Append Line activity which we named it as “Generate Password Letter” we want to create a text file, the name of the text file will be the same as the SAM account name specified in the “initialize data” activity (notice how we keep making use of previous data used in previous activities ? this is the main idea), so you will right click in the blank area next to file property, choose to subscribe to published data, choose “initialize data” activity, choose SAMaccountName, after that make sure to type .txt .. so the file name will be {SAMaccountName from “initialize data”}.txt
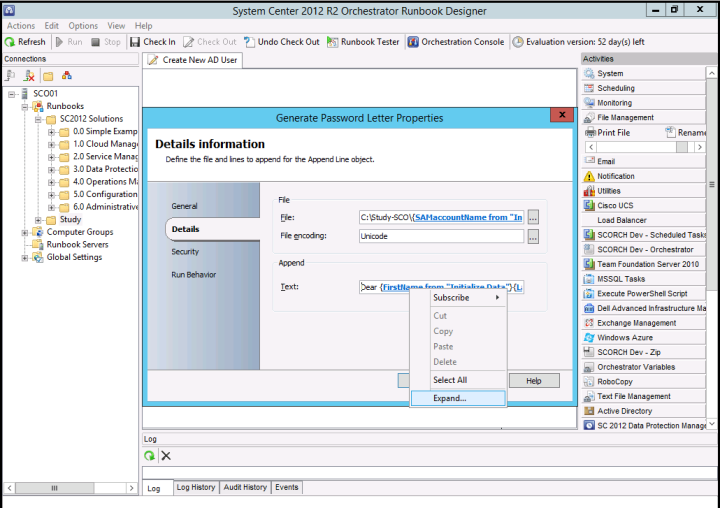
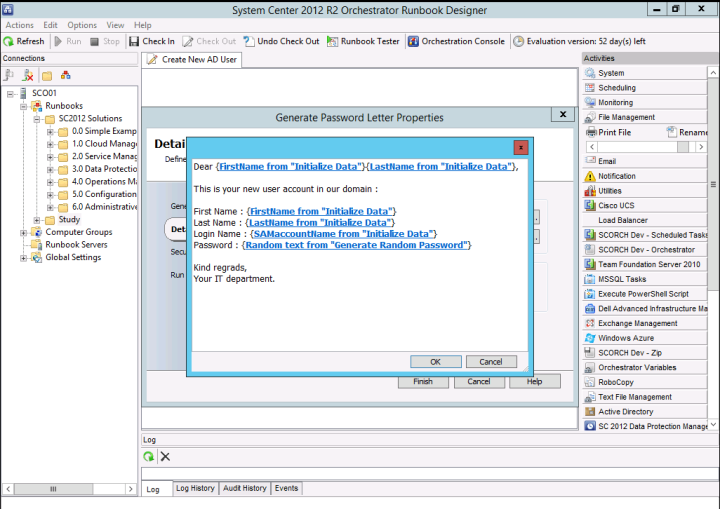
Next to text property right click and this time choose expand to specify what is going to be written in the text file, remember, anytime to want to make use of a published data from a previous activity right click, choose subscribe–> published data and choose your activity and your data desired please check the following snapshots
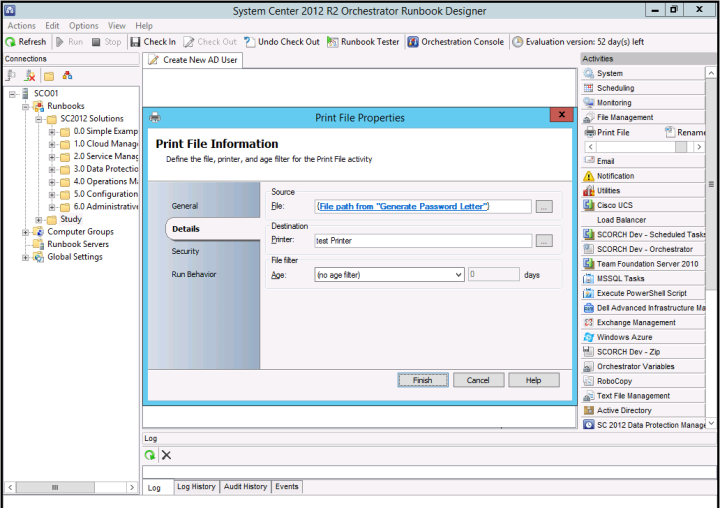
Finally we will print this file, in my case I don’t have a printer so I typed “test printer” and chose the file from the previous activity like the following
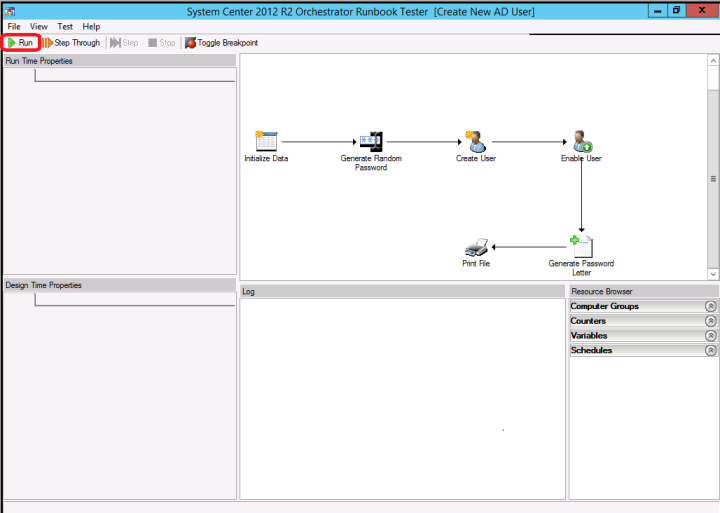
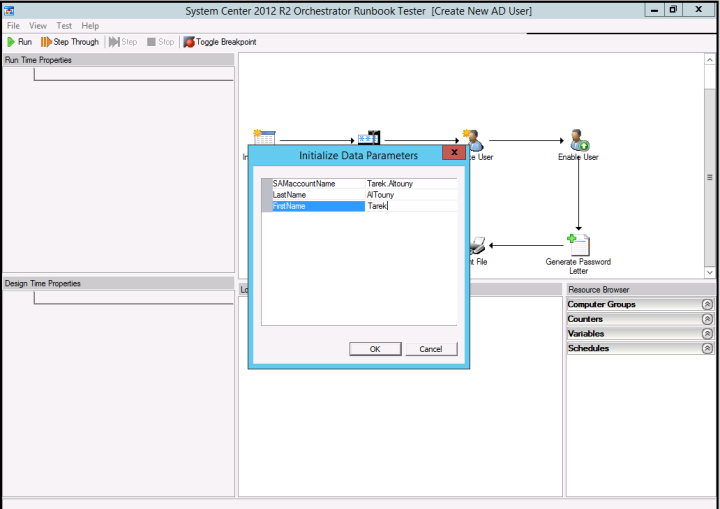
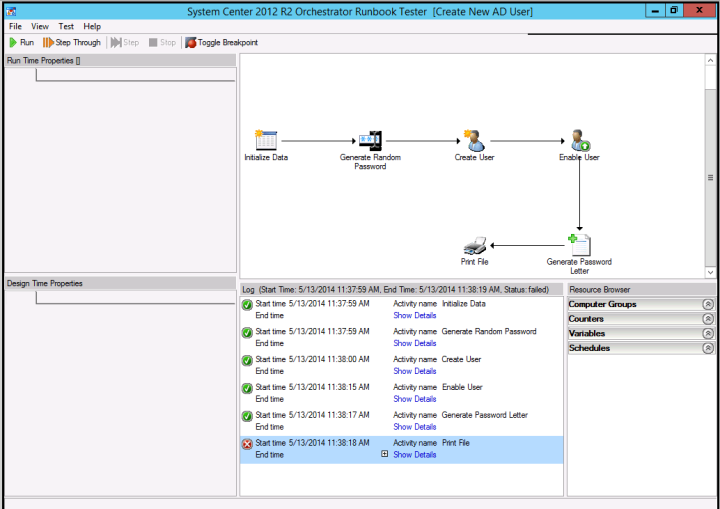
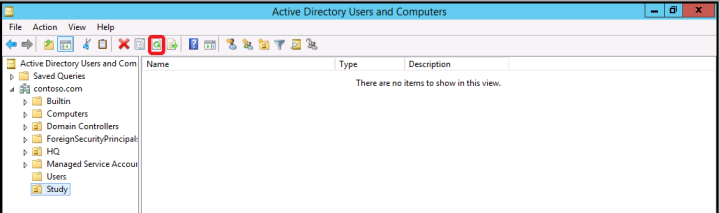
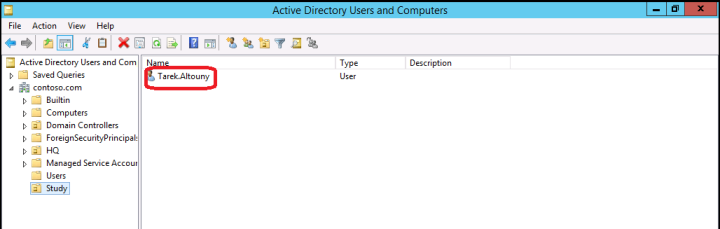
Now we want to test our runbook, remember the part of the printer will fail due to the absence of the printer but the previous parts will succeed, this is a good chance too to see how runbook tester works and shows you which part of your runbook failed .. please check the following snapshots, remember , runbook tester is not meant to simulate your runbook, so it will actually perform these tasks and attempt to create an actual account ..
In other blogs I will walk you through different examples with System Center Operations Manager and Service Manager, See you there ..
Thank you for reading ..
Reference : PACKT Microsoft System Center Orchestrator Cookbook
Advertisements Share this: