By Lindsey Lockwood
Prints can be made as a one of a kind Artist Proof, or they can be reproduced and numbered into an Edition. In this post I’ll be discussing the basics of an Editioned print run, using one of mine as an example.
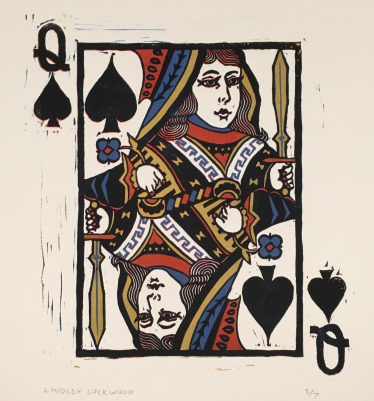
Shown above is a single print, a part of this edition. This is a color reduction study of mine; I chose to design and print a playing card because I was new to the process of a color reduction and wanted to see what level of detail I could achieve. This print has four layers of ink, yellow being the first, red second, blue third, and black last. If this was a stand-alone print all on its own it would be labeled as an Artist Proof, but I went out of my way to print several identical copies of this design to create an edition.
Limited EditionThis series actually qualifies as a limited edition. Now that the carving is complete it is impossible to print the colored sections from this block again. Only the black shapes and outlines are left in the bare linoleum.
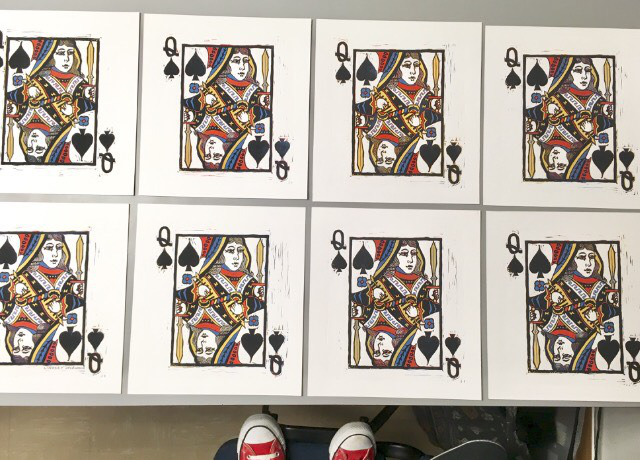 My Shoes included for Scale
What makes an Edition
You’ll notice in the first picture shown the bottom right hand side features a 3/7. This means that 7 prints out of this run were identical, and that that specific one happened to be the third one of the bunch. You’ll also notice that in the picture shown above, there appears to be 8 copies of this card print. The official edition was only seven prints long because some of them had errors or were slightly asymmetrical to the copies.
Below is a grouping of details from two prints that didn’t quite make the cut. The corner border on each of them features blotchy yellow spots; in printing the final coating of black ink stuck to the linoleum instead of the paper, pulling up the red and blue ink underneath. Additionally, the linoleum wasn’t centered perfectly for these colors to line up just as they should. The strands of hair should be appearing more or less white, and in both of these the red and the blue unfortunately show through. While these two prints still carry the overall image and intention, they cannot be a part of the overall edition.
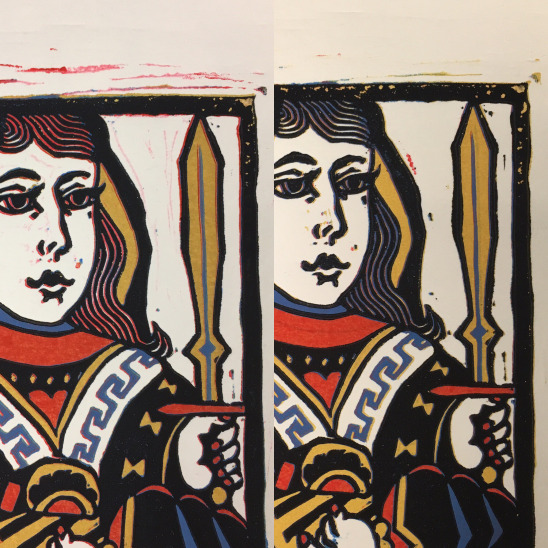 Two Error Prints – See the mistakes?
The other most important part of creating an edition is marking & signing them the correct way. It’s important to use a finely sharpened light pencil, so that the paper itself is marked but the mark doesn’t distract from the print.
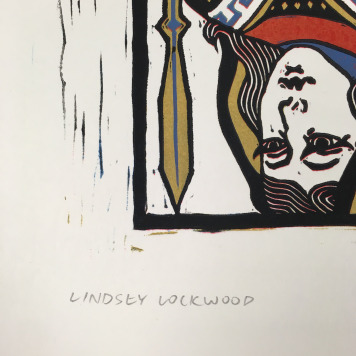
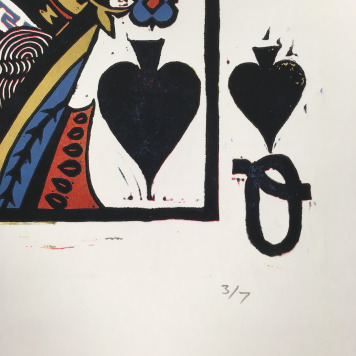
The signature goes on the very bottom left hand side. Each print of the edition must be numbered accordingly; this is shown in a fraction form on the bottom right hand side of the paper. The number isn’t meant to have any significance, because each one is supposed to be exactly the same. This series happens to be untitled, but if an edition does have a title it would go on every single print, centered at the bottom, in the middle of the signature and the edition number.
While not everyone’s work may require copies or fit the nature of an edition, going through the process of doing one the right way is instrumental to learning proper craftsmanship and how prints are finalized for display.
Thank you for reading!
Share this:

