Hey guys! Last week I posted about the adorable “class of 2028” shirt I made for Aubrey and today I’m going to walk you guys through how I did it!
Check out my post about the t-shirt here: https://champagnemommy.com/2017/05/26/graduating-class-of-t-shirt-tradition/
I don’t have a custom screen printer at my disposal or a cricut to do things like this at home. What I do have, however is a $5 roll of freezer paper and a little bit of free time. I learned this trick back in high school and have been using it for simple projects ever since.
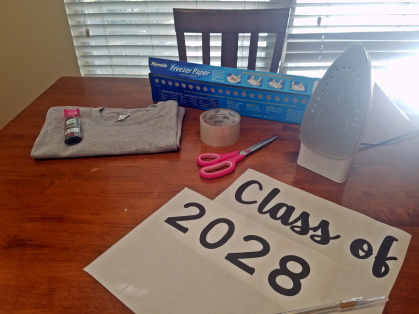

Materials needed:
Freezer paper, Reynold’s brand
cotton t-shirt (I used an adult size M, you want it to be big)
fabric paint and a foam paintbrush
scissors and an exact-o knife
tape
an iron
I’ve been using the same roll of freezer paper for years (one roll will literally last forever if this is the only thing you use it for) so the only thing I had to buy for this project was a $2.79 t-shirt from Hobby Lobby!
Total cost = $2.79 // Total time involved = about an 1.5 hours, not including drying time.
The first thing I do is to cut down a chunk of freezer paper into an 8.5×11. I find it’s easiest to tape two pieces of printer paper on top of your freezer paper, horizontally, and trim them down to match, (pictured in the top left). Now you’ve got two sheets of freezer paper you can feed right through your printer. When you do print, make sure to print your design onto the flat side. The shiny side is what you will iron down onto your shirt.
I wasn’t crazy about any of the standard fonts I had on my computer so I downloaded a cute one from dafont.com For the “class of” I used Georgina (in size 400). I used Courier New for 2028. I decided to print them separately vs. on one piece of paper so I could blow them up as large as possible.


Once you’ve got them both printed, start to cut the letters out. I typically do this on top of a thick piece of cardboard – this time the closest thing I could find to use was the back of a sketchbook. You’ll need to be extra careful with letters like the “a” and “o” that have center pieces. I leave a little “bridge” of paper when cutting to keep everything in place.
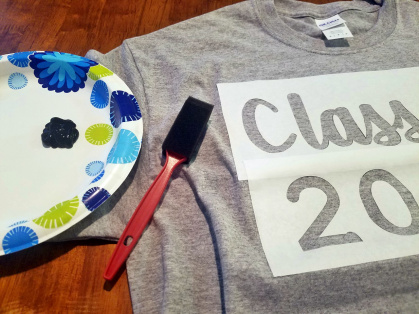

Cut your design down to a size you’re happy with and iron away! I’ve found that when I think I’m done ironing, it’s best to iron for a little longer! I was in a rush and in my finished project, you can see where I didn’t do a very job on the ironing and the paint bled a little. After ironing, I go back in with my exact-o knife and VERY carefully, cut out those small bridges I had left on the letters with center spaces (like the “a” and “o”).
Be sure to put a piece of cardboard in between the shirt layers before you begin painting to keep the paint from bleeding through and use at least two coats, depending on what color you’re using. I like to let each coat of paint dry for about 30 minutes. If you’re in a hurry, you could use a blowdryer to speed things up! Let the shirt dry for a few hours before pulling the stencil off and then overnight before using.
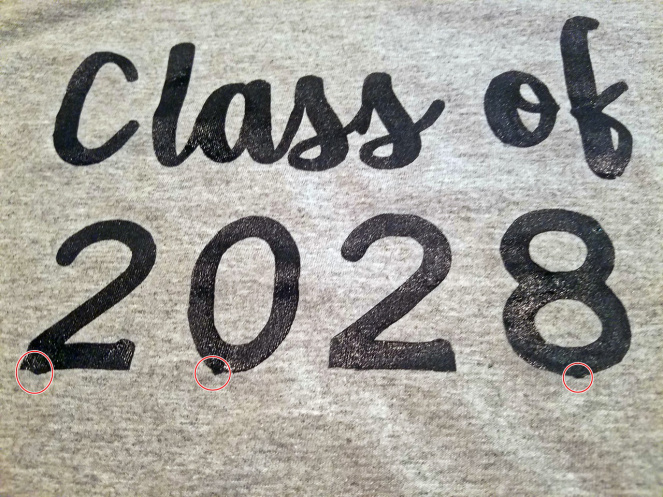
I circled the spots in red to show you where I had problems with the paint bleeding. It wasn’t anything extreme and over all, I’m still really happy with the way it turned out. Next time, I’ll try to have more patience and maybe not try to tackle this project with a needy kid clinging to my hip!