There are few different ways to screenshot and one might be better than the next depending on what you are trying to accomplish. Below is a list of options with some quick tutorials. My most utilized features are denoted with asterix. Click the links to go directly to that section.
- Print Screen Button – Screenshot entire screen
- *** ALT + Print Screen Button – Screen active window
- *** Snipping Tool – user defined area w/ markup capabilities
- Screenshot Tool within Outlook – user defined area
PRINT SCREEN BUTTON
On everyone’s keyboard there is a button labelled PRTSC, PRTSCN, or something along those lines. Using this key will screenshot your current screen and make a copy to the clipboard. You can then ‘paste’ this screenshot into a word document, email, or other applicable area. To paste – right click and select ‘paste’ or use the keys CTRL+V.
ALT + PRINT SCREEN BUTTON
This option will screenshot the window that you are currently clicked on. To initiate this screenshot, hold down the ALT button and then press the PRTSC key. The screenshot will be copied to the clipboard where you can then ‘paste’ this screenshot into a word document, email, or other applicable area. To paste – right click and select ‘paste’ or use the keys CTRL+V.
*** If you are using a remote desktop window, that window will need to be full screen for this option to work within the remote desktop. If the window is not full screen, it will screenshot the full remote desktop window instead of the active window within the remote desktop. ***
SNIPPING TOOL
All Windows computers come pre-installed with an application called SNIPPING TOOL. You can access this program by going to your Start Menu and searching ‘Snipping Tool’. One the program is open, you can select NEW and you will be able to click and drag around the area you want to screenshot. Once the mouse button is released it will open a window with the screenshot where you can mark it up with the pen tool, save it as a file, or copy it by right clicking on the image. This is a very useful tool.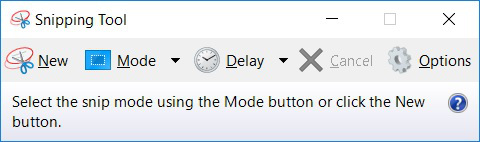
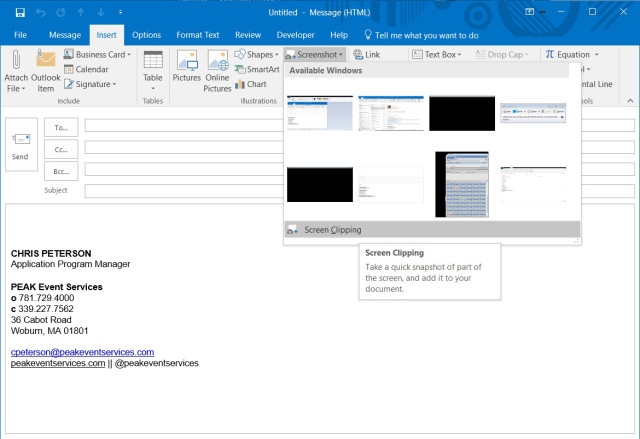
SCREENSHOT TOOL WITHIN OUTLOOK
Outlook has its own screenshot tool that will drop the screenshot directly into the open email. To initiate this feature, open a new email and navigate to INSERT on the ribbon/toolbar. With the cursor active in the body of the email you will be able to see the SCREENSHOT button active. Clicking that button will give you the option to automatically screenshot any active windows, much like the ALT+PRTSC option, or the otpion to choose Screen Clipping which will allow you select your own area, much like the Snipping Tool. Once an option is chosen and/or an area selected, the screenshot will be automatically added to the email.