Today I’m dipping my toes into 1918, and the wonderful fashions it has to offer.
I actually researched this period quite heavily earlier in the year when I was pursuing a design job for something set in the early 20’s. The job didn’t work out, and it left me a little bitter towards the era. But this weekend my mom and I booked tickets to the Downton Abbey Exhibition and I thought it would be fun to wear an understated period costume to the event.

The late nineteens are a perfect period for casual historical dress since the silhouette (though more modest than what is fashionable now) wasn’t dramatic like the early 1910’s, or the later 1920’s. Though corsets would have still been worn during this period, waistlines were starting to widen and you can get away without one. Perfect since I would have to wear this for four hours of public transit!
(it was also 2 days after Thanksgiving so a corset would not have been welcome regardless of the wear time…)
I based this ensemble mostly off of two ads: This one for the blouse, and this one for the skirt. I also made a coat to wear over it, which was based on ones from a winter Sears catalogue.
I had all the materials for this on hand, and made it over a 4 day period (some of those were half days with Thanksgiving and all). I’m really pleased with the end result and this may motivate me to make more vintage themed clothing to wear on a regular basis!
…
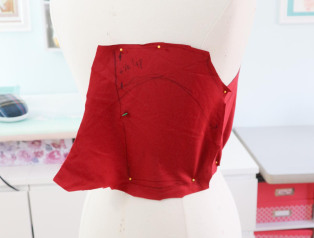
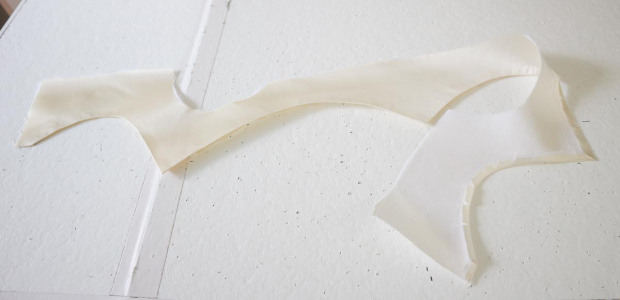
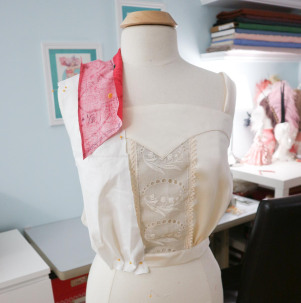
I started with the first piece: the camisole.
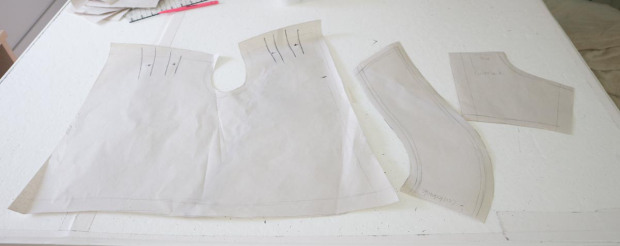
I draped this on my dress form. Getting the right amount of flounce at the hem to create the proper silhouette was probably the most difficult part.

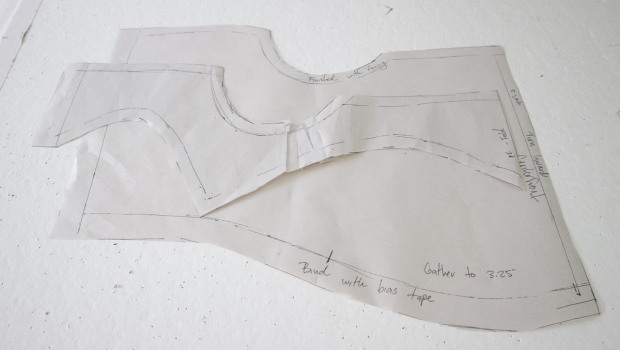
This is it transferred to paper.
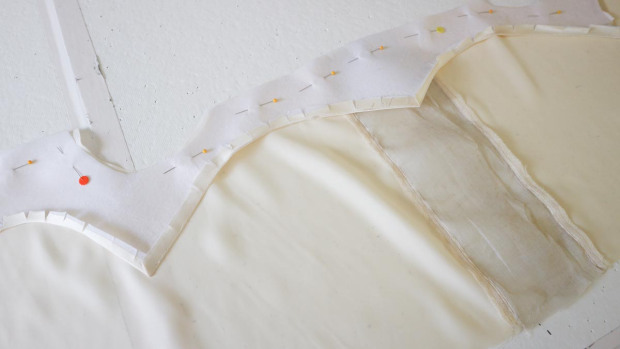
The body of the camisole is made from silk charmeuse. This particular cut was *very* off color, so one side is more yellow than the other, but it’s only really noticeable at the back.
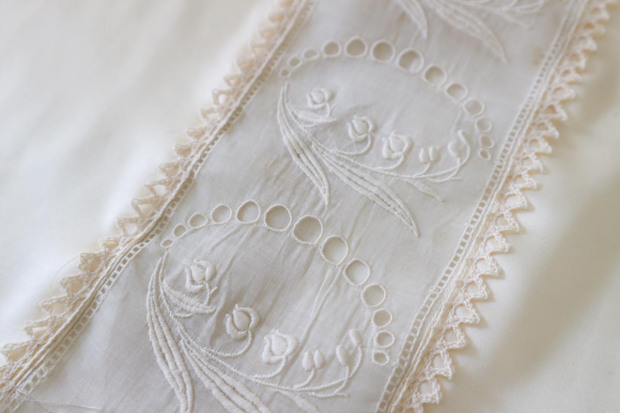
I sewed a strip of wide cotton lace into the center (backed with more charmeuse) to serve as the statement of this blouse.

I’m not sure when this lace is from, but it came from a collection that included pieces from 1910. Based on the design and weight I would not be surprised if this lace was also from that period. I outlined it with some zig-zag edging to add a bit more texture.
The collar of the camisole is also charmeuse, but I backed it with fusible interfacing. Then I stitched a half inch away from each edge, and used that as a guide when turning the edges inward.
It was pinned to the top edge of the camisole, with the right side facing the wrong side. Once turned the right way out all the raw edges will be hidden!
Then I topstitched the bottom edge down.
The bottom edge was gathered slightly at the front and sewn to an interfaced waistband.
The final addition were straps, made from bias cut strips sewn into tubes.

The back closes with three glass buttons. This is the first time I’ve done functional button holes in…3 years? Maybe longer?
I finally bought a home sewing machine, which though slower than my industrial, has some stitches and features that I’ve missed! The automatic buttonhole is one of those things.
It is a SINGER 4423 Heavy Duty *, if you were wondering. I go more in depth about it (and all my sewing machines) in this video.
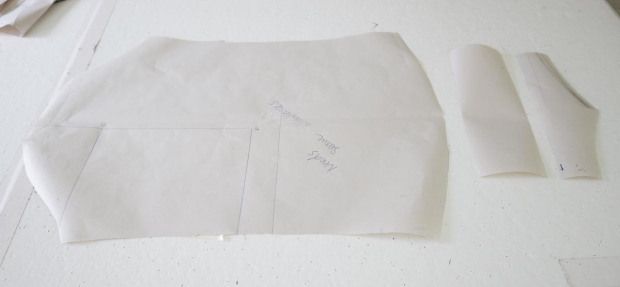
I used the camisole as a base for draping my next pattern: the blouse. I believe these pieces would have been combined in the 20’s, with a closure hidden on one side. But I thought making them separate would make the pieces more versatile. And the camisole also provides enough coverage that I didn’t need to wear a slip over my bra.

Here is the pattern I ended up with. It’s shaped by pleats below the shoulder with a drawstring waistband.
I cut all the pieces out from a thin, crisp, silk shirting. This fabric was a dream to work with – I’ve never had something make french seams easier!
I didn’t take a lot of progress pictures for this, since it came together in a single evening. But here you can see the main pieces assembled. All the edges were finished by machine with rolled 1/4″ hems. Seams were flat felled, or finished with lace binding. And the bottom edge was turned inward to create a channel for ribbon.

I tried to draft the sleeve pattern for this the historical way, but I got confused and made it up instead. This worked surprisingly well! Fit the armscye perfectly on my first try. I just had to adjust the length and width a little.
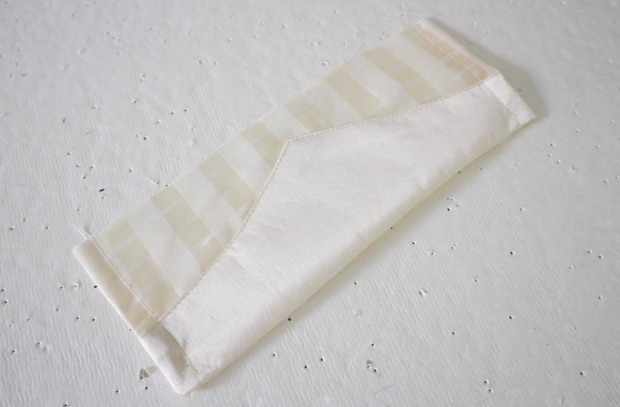
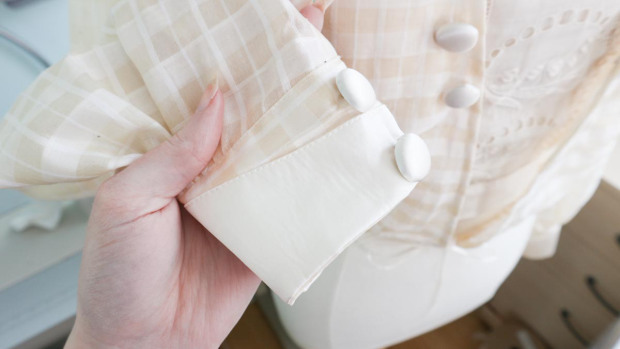
The cuffs were gathered by machine.

Then sewn onto the cuffs. The raw edges were bound with lace binding. I wanted to add button closures but didn’t get the buttons (or know what size they would be) until the day before wearing this piece, so I used hooks instead.
The sleeves were sewn on by machine, then the raw edge was bound.
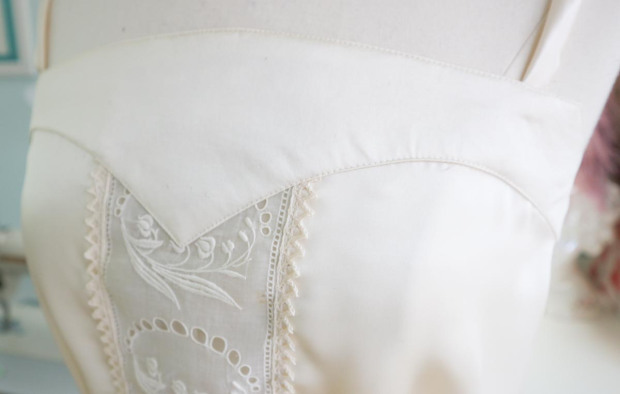
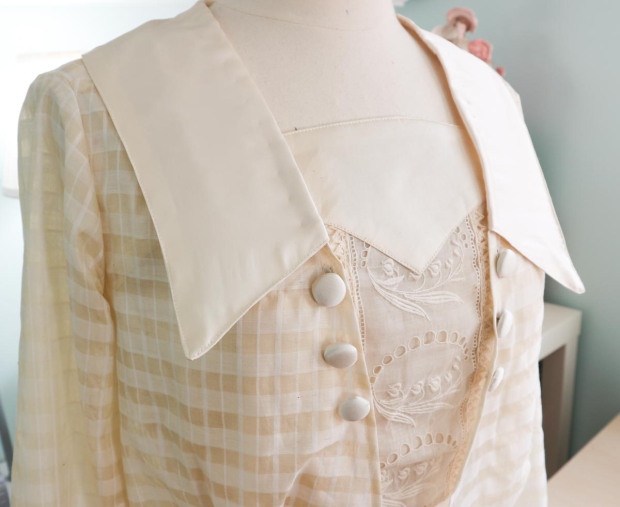
I also made the collar. This was assembled from a layer of the checked silk, which was backed with interfacing, and a layer of silk charmeuse, which was supposed to be lining. I sewed the layers together with the wrong sides facing each other, then topstitched around the edge.
It looked great! Until my iron smeared burned goop all over the corners of the checked side. I couldn’t get it off, and I didn’t have a lot of fabric left…so I made the charmeuse side face out instead. I actually really like the contrast of this, so it was a happy accident. But it means the topstitching looks a little sloppy since it was originally done on the other side.
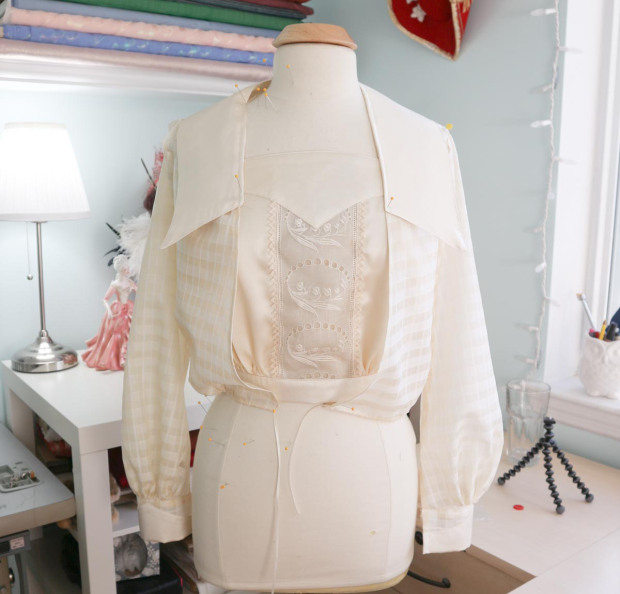
I sewed the collar on by machine, then tacked it down a half inch away from the edge to keep it in place. The final touch were silk covered 3/4″ buttons. Three on either side of the bodice, and two on each cuff.

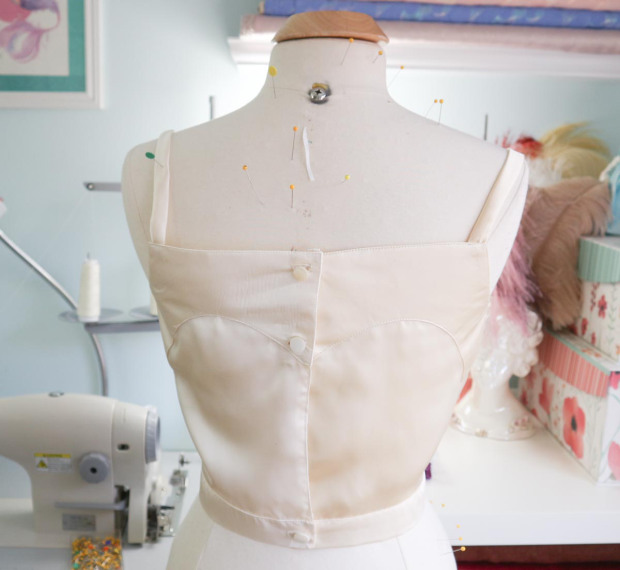
I also added a snap just above the top button to secure it to the camisole.
And the back! I didn’t expect to love this as much as I do, but I’m really happy with it. It’s delicate yet structured and so different from anything I’ve done before.
I usually shy away from thin or slippery fabrics, unless I’m using them as an overlay. But making a tailored piece out of them was surprisingly easy and fun – I think this will motivate me to branch out more with my fabric choices.

…
Unfortunately the skirt didn’t go as well. At all. My first attempt was made from a beautiful wool, but the finished skirt looked awful. It had a wide, rounded waistband that made me look so heavy.
There was also way too much fabric, and it drooped at the seams. It was supposed to have pockets, which I tried making out of a contrasting wool, but then there was way too much contrast. So I remade them from matching fabric and it looked even worse! The whole thing was an unsalvageable mess.

Attempt number two was made in three hours from a purple chevron fabric I got from the plaiditudes collection at Jo-anns. I draped the skirt design on my dress form, then used the muslin as a pattern, adding seam allowances by eye. It was SO messy, but the end result turned out a million times better than my first attempt.
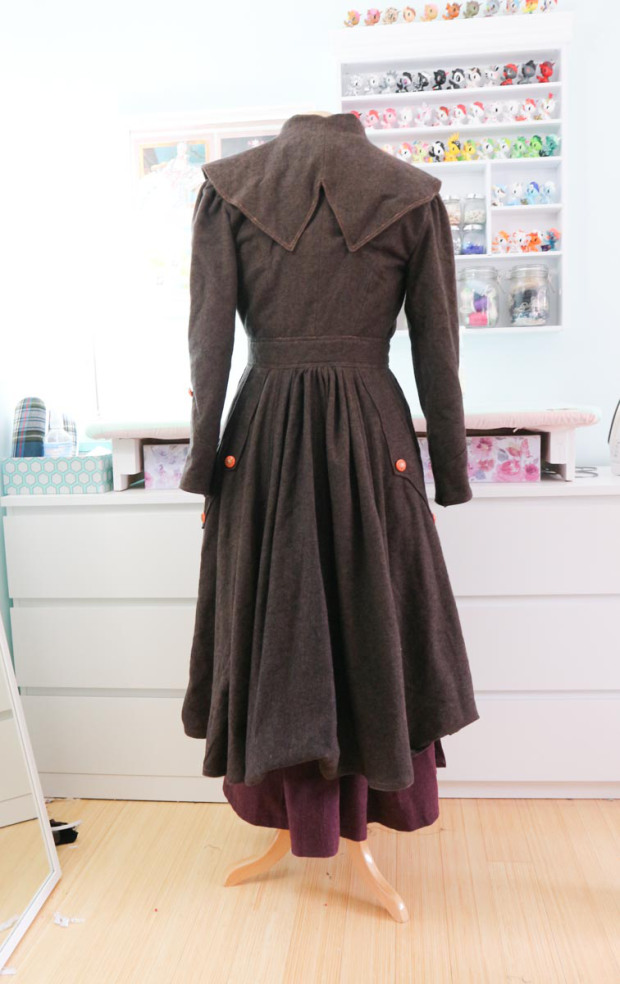
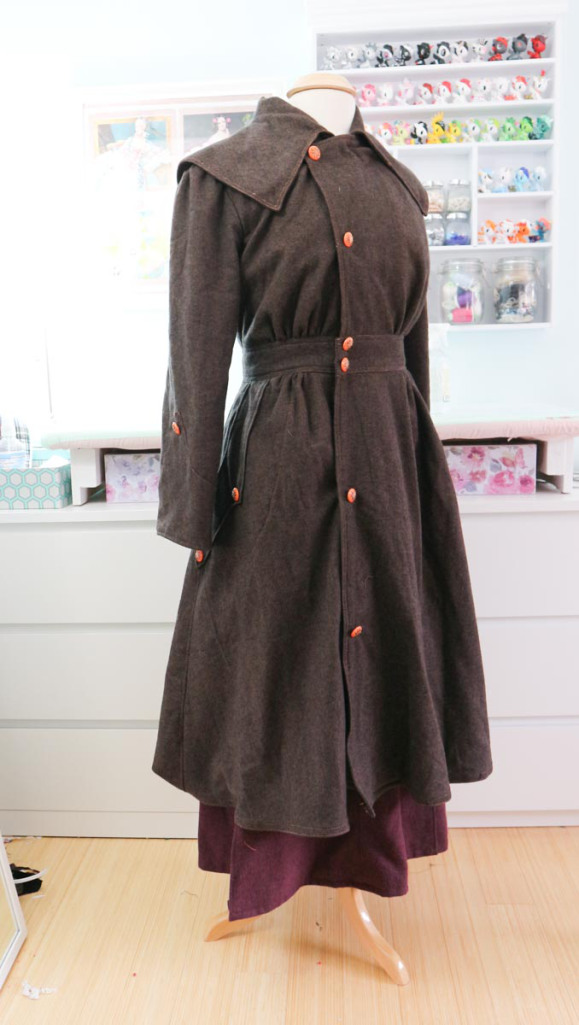
This skirt has way less volume, and has pleats in the back instead of gathers. The waistband is still wide, but it’s straight which is a lot more flattering. And there is decorative seaming down the front instead of pockets.


It’s not my best work, but it fit, and it looked pretty good!
I think the same can be said about the jacket. This piece was actually drafted, partially assembled, and completely cut out over a year ago – I even made a video about it. I planned on this being my winter coat for 2016, but after buying a glorious winter coat from J-Crew I lost interest.
The jacket also had some issues I wasn’t happy with. I ran low on material so I couldn’t make the skirt as wide or long as I wanted (it actually has plenty of volume, so I’m sort of glad for that now). I also had to ignore the grain line on some pieces, and didn’t have enough left for a matching hat which I was originally really excited about.
Plus the topstitching on this jacket was plagued with problems. It kept skipping stitches, which meant I had to sew over them again, leaving backstitch marks. This was made worse by my plan to use contrasting stitching during construction.
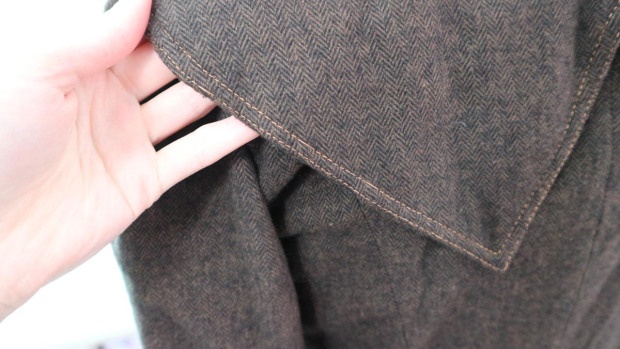
Even though this was only a year ago, I’ve learned a lot about my machine since then and working with heavier fabrics in general. Unfortunately that helps me moving forward, not with the issues this jacket already had. To fix the topstitching I would have had to completely disassemble the bodice and remove it all by hand. And that still wouldn’t resolve the grain line or length issues.
But I already had a lot done. So I decided to take a half day and get it finished, fully knowing that it was impossible to make it perfect given its other issues.
Finishing it included:
Figuring out which pieces went together
Figuring out wtf I was thinking with the pocket design (the required topstitching would have sewn them shut..)
Sewing the entire bottom half together
Hemming it
Sewing the cuffs on
Attaching / lining sleeves
Attaching bottom half
Lining the waistband
Sewing in closures
Tacking the collar
Sewing on buttons
…in less than a day.
Surprisingly, it turned out okay! I’m not going to share close ups since the finishing isn’t great at all. The interior skirt seams were left raw, and the topstitching got a little messy at points. But it’s finished, and I love the shape and design of it. Hopefully I can reuse the pattern for a similar jacket, made to my current standards.
It’s a little wrinkly from yesterday.

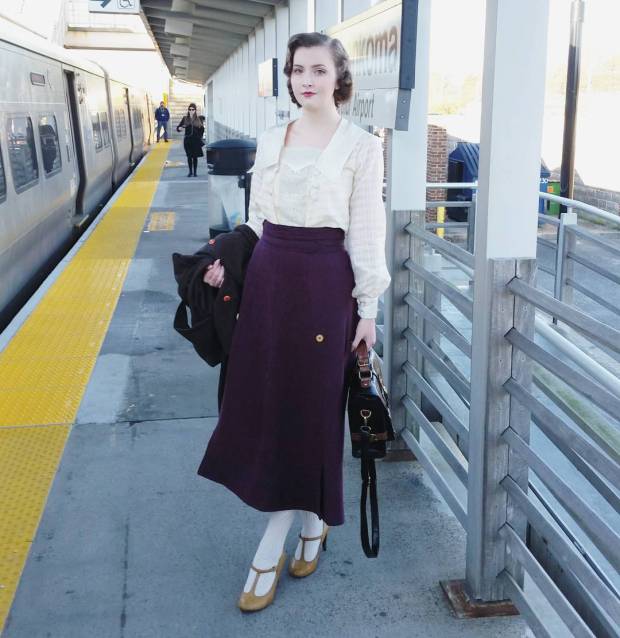
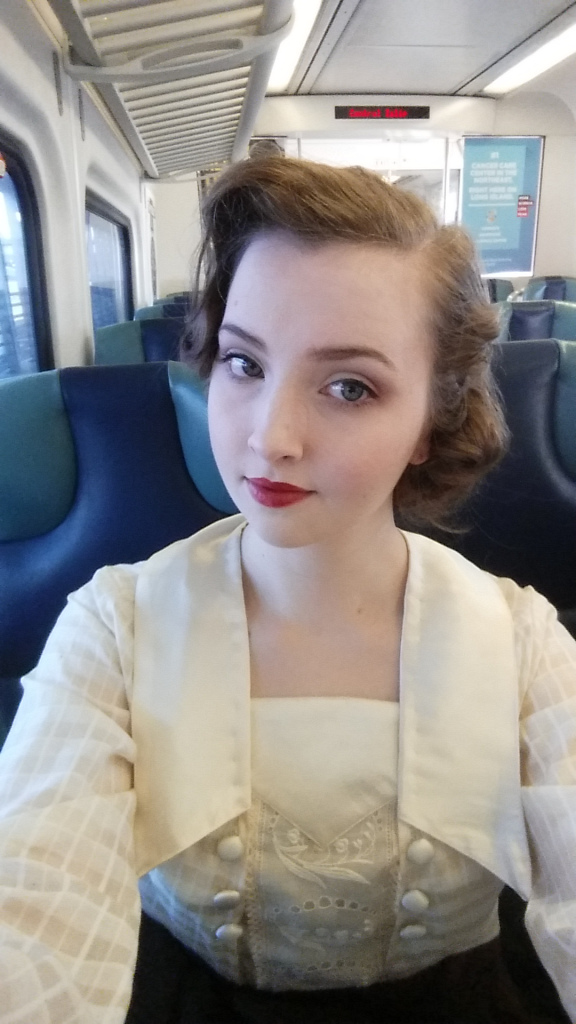
And that is it! Four pieces in four days. All together I think they looked lovely. And it was surprisingly comfy and weather appropriate!
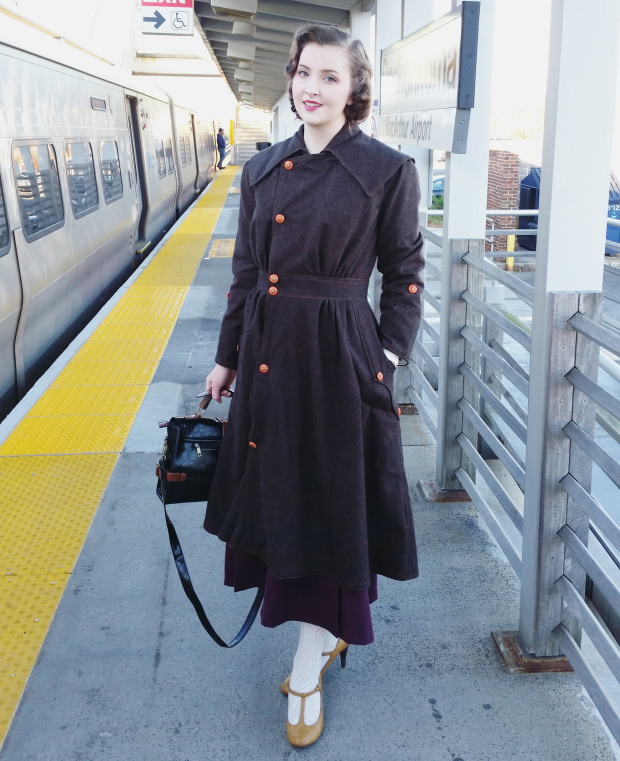
I accessorized the ensemble with a pair of Katie & Kelly shoes (these were like $12 on clearance at DSW last year) and the Authentically Academic bag from Modcloth. I had gloves from the 40’s with me too, along with a 50’s themed pair of Quay sunglasses…so it was a little all over the place, but very retro.
For my hair I slept with a mixture of 3/4″ and 1″ curlers in, all wound inward towards my face. In the morning I brushed them out, then tucked the ends under and pinned them to the base of my scalp.
Sort of how you would do a faux bob, but the volume from the curls makes it look more like a fancy up do. I teased my bangs a bit and pinned them to the side. Then sprayed my hands with hairspray and used them to smooth and flatten the top before setting it with a heavy misting. It’s probably more of a 40’s style than 1918, but I felt it looked passable.
Any loose bits are probably from me trying to adjust bobby pins after putting the blouse on and getting the buttons caught in it. That happened several times.
That is it for today! Thanks for reading!
My next post will be about the exhibit itself!
Advertisements Share this: