For those of you who have visited my Etsy shop, you know I like making crafty things. The following is an idea I was working on over the holidays.
Several years ago, I purchased a wreath made of paper butterflies for my youngest, and sadly somewhere in our two moves since that time it got lost. I know I packed it carefully, but it never has turned up. It was such a happy wreath and fits so well with the butterfly theme of Lupus that I thought I would try making my own.
It has taken a couple of tries, and I’m not sure I am finished yet. The first try was with a wood wreath form, batting, floral and washi tapes. It sounded much more fun and less sticky than it felt while making it. My second try was with a styrofoam wreath form. It turned out much better. Instructions and photos follow.
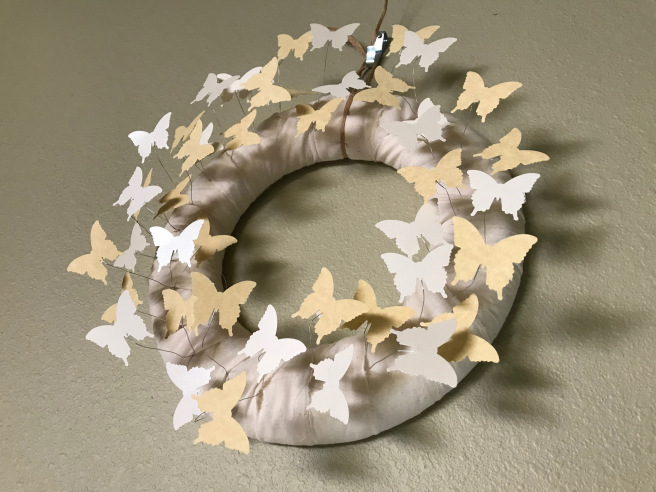
Materials: Styrofoam floral mold, uncoated (silver) floral wire, natural muslin ripped in 1.5″ strips, raffia or twine, paper butterflies (approximately 40), and tape or hot glue.
Tools: Wire cutters, jewelry pliers, hot glue gun (if desired).
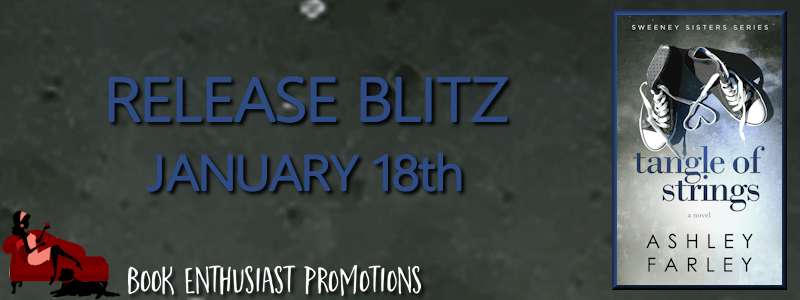
Tie uncoated floral wire around the wreath at approximately one-inch intervals, twist sides around each other to hold. Wrap the wreath with ripped strips of natural muslin. I love the texture and imperfections in natural muslin, and it rips evenly to create a nice raw edge.
The wreath is tied at the top with raffia, both to hold the end of the muslin in place and for hanging the wreath. Twine would work just as well, but I had the raffia handy in a natural kraft brown color. I did not see a need to glue or otherwise secure the muslin, but you certainly could.
Next, I trimmed the pairs of wire to staggered heights – one high and one low in each pair – to create some depth. The ends were curled with jewelry pliers and bent to create a flat surface for the butterflies.
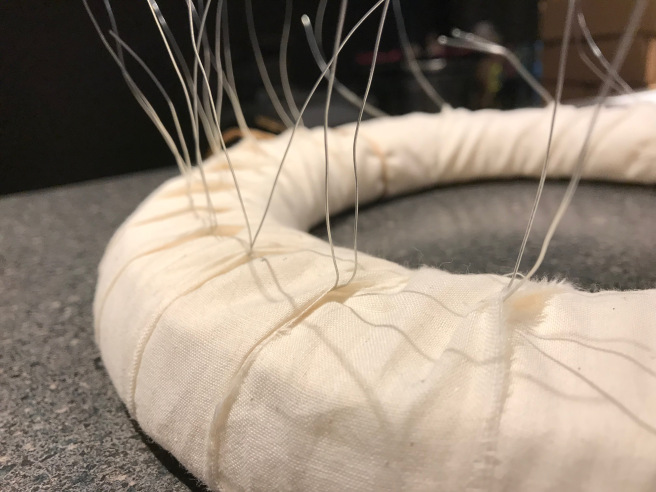
The butterflies were attached first with masking tape to test out the design.
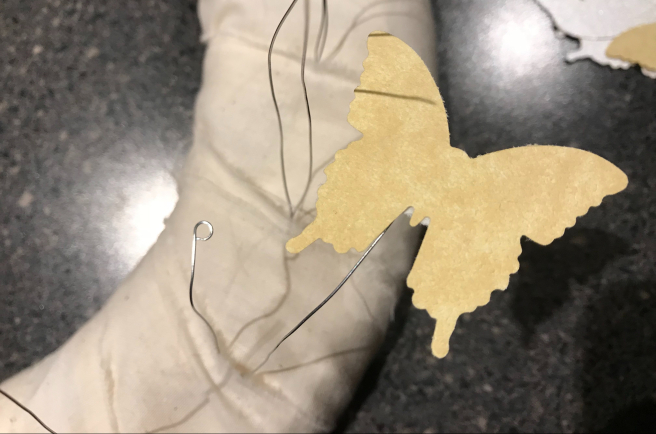
The butterflies are cut from two different sheets of heavy paper, one a glittery cream color and one a textured parchment color, using a Fiskars squeeze punch. I mounted them on both sides of the paper for four different butterfly variations. The differences are a bit hard to see in the photos, but the effect in person is nice.
Wires were bent and staggered to look like a flock of butterflies taking flight. The end result was a lot closer to my vision:
The whole thing took a couple of hours start to finish. I thinking this could have some neat variations with paper colors, dying the muslin with coffee or tea, or inking the butterflies.
Advertisements Share this: