Blacksmithing is one of those skills that just gets you a huge amount of man points and it is something that I wanted to try.
Now I know what you are thinking that is something that is expensive to start, but as you can see from my set up you can get started with just a few dollars. And in my experience it is well worth the investment just for the fun of getting a fire to heat steel until it is glowing hot just so that you can hit it with a hammer, I mean it involves fire and hitting things with a hammer it is what we all like to do.
To start off I will say that I do not know much about blacksmithing I just got a hammer and a piece of rebar and saw where it took me.
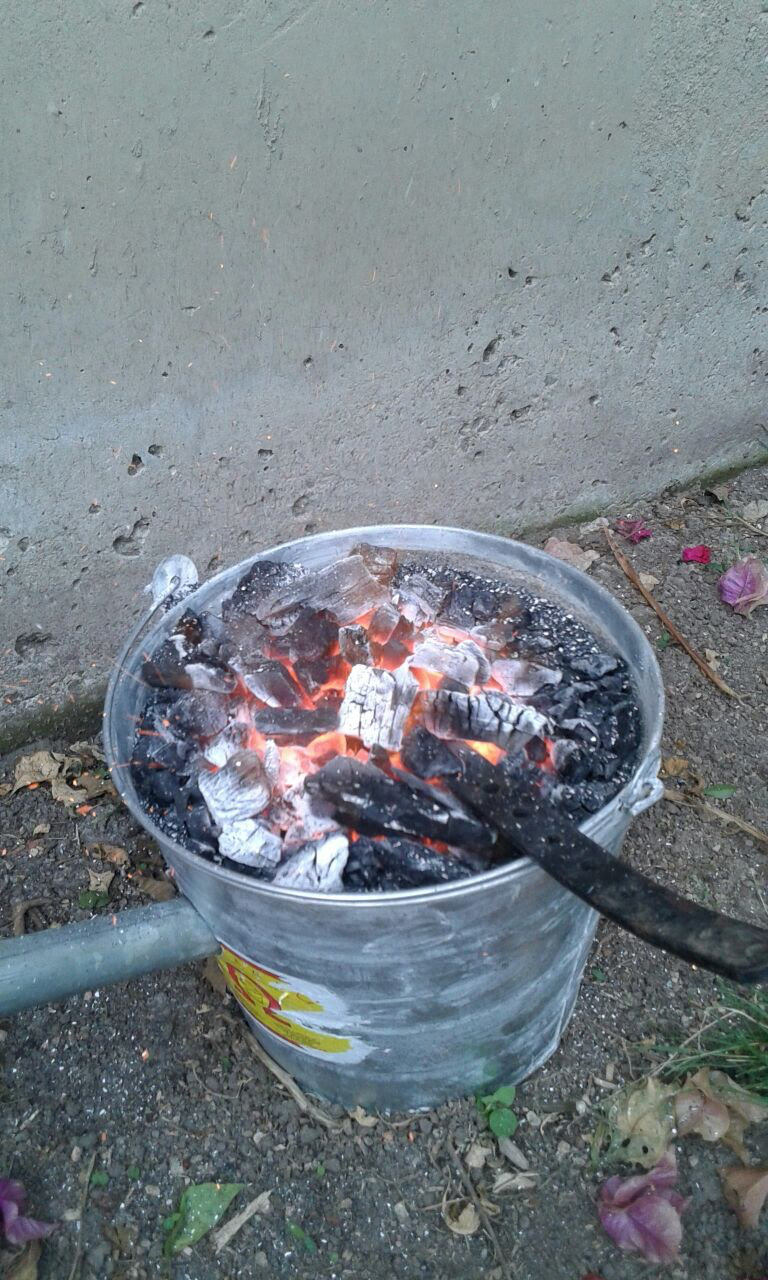
For my forge, I used a metal bucket filed wit plaster of Paris and sand to act as insulation and I then drill a hole in the side to blow air into it using a hairdryer, so you can see that it is really simple and inexpensive. for my fuel I used your normal bag of charcoal lumps, which I will warn you, you will use a lot of I think I used the whole bag in this project.
For my anvil, I went to the junkyard and picked up a 40 Lb steel disk for $10 and I mounted it on a stump with some screws on the edges so it wouldn’t slide. As far as my other tools I used a 2Lb engineers hammer and as some pliers as “thongs” but it worked well and I was able to get a decent looking knife for my first ever attempt at forging.
I started with a piece of scrap steel I had just to play around and get a feel for what I was trying to do once I felt comfortable I moved on to my rebar and there was not a moment I was not doing something while my rebar heated up I was crushing charcoal so that it could fit in my forge. while forging I would recommend using long sleeve because as I soon discovered there are a bunch of little sparks flying all around that sting every time they land in your arms.
To forge the knife I first started by flatening the rebar by placing the part where I wanted the ricasso of the blade on the edge of the anvil and hammering it flat while fliping from side to side; once I had a thikness of about 1/8 of on inch I rested the knife on its spine and hammered the point by hitting with the hammer at an angle and then flatening the sides again once I had the shape done I went to hammer in the bevels by placing the knife at an angle in the anvil and striking with the hammer at an angle this worked but caused the blade tu curve upwords wich is why I had to place it on its spine and hammer it flat, I just kept on going until I liked the shape but I felt it was to straigt so I decided to put a curve on the handel.
Once I was done with the forging I let my knife cool down and I then used a flap disk on an angle grinder to finish the bevels and to ad an edge, this worked great because of the uneven surface I was left whith after the forging and it then only requiered a little bit of sanding. For the handle I left the forge scale on it because it comes out a nice black color which helps protect against rust.

And the final product!
Advertisements Share this: